Procedural Flame Animation
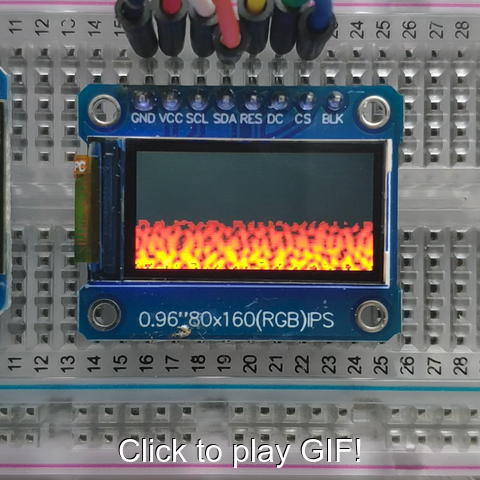
A flame animation was one of the first things that made me wonder: how the hell do you code this? how do you know where to draw which color, somehow, that it looks kind of like a flame. This is nothing you do right the first time but slowly work yourself to the result.
This is what this howto will show you.
Table of Contents
- TL;DR
- Hardware Setup
- Step by Step to a flame animation
- The complete Code
- Next Steps
- The DOOM Version
TL;DR
If you’re not into reading tutorials, and just want the bare minimum…
- ESP8266/D1mini (I bought this one)
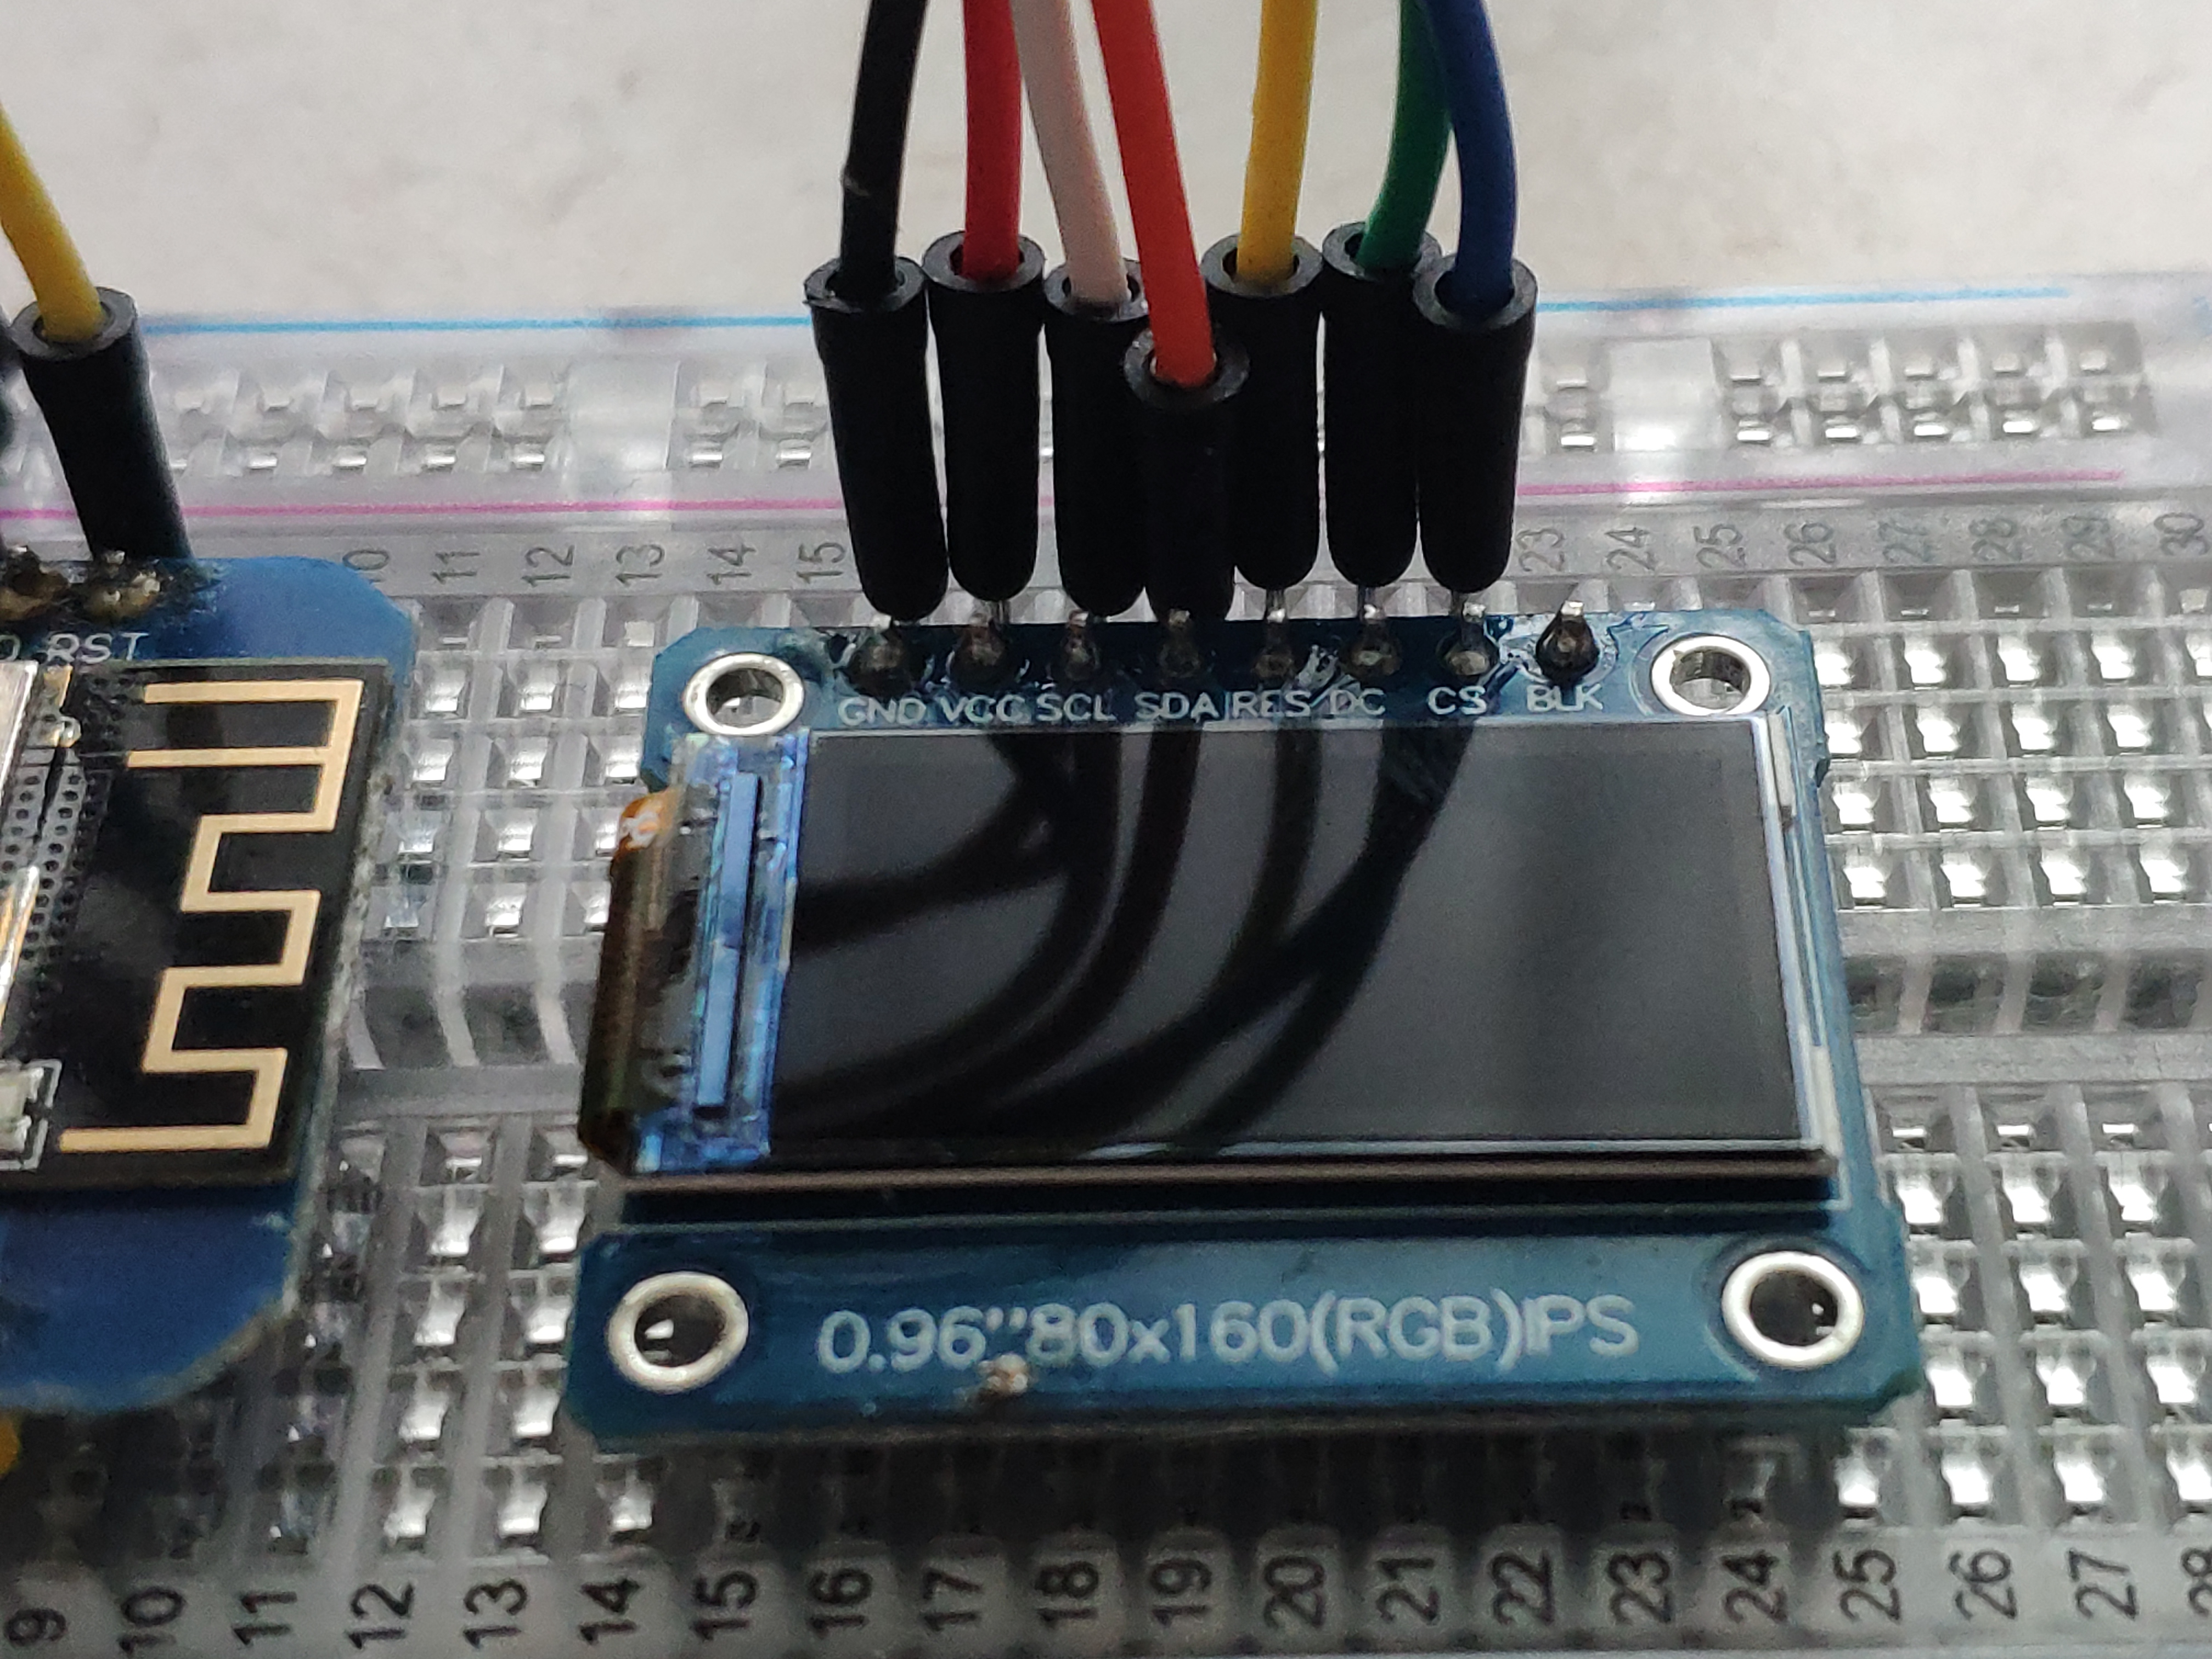
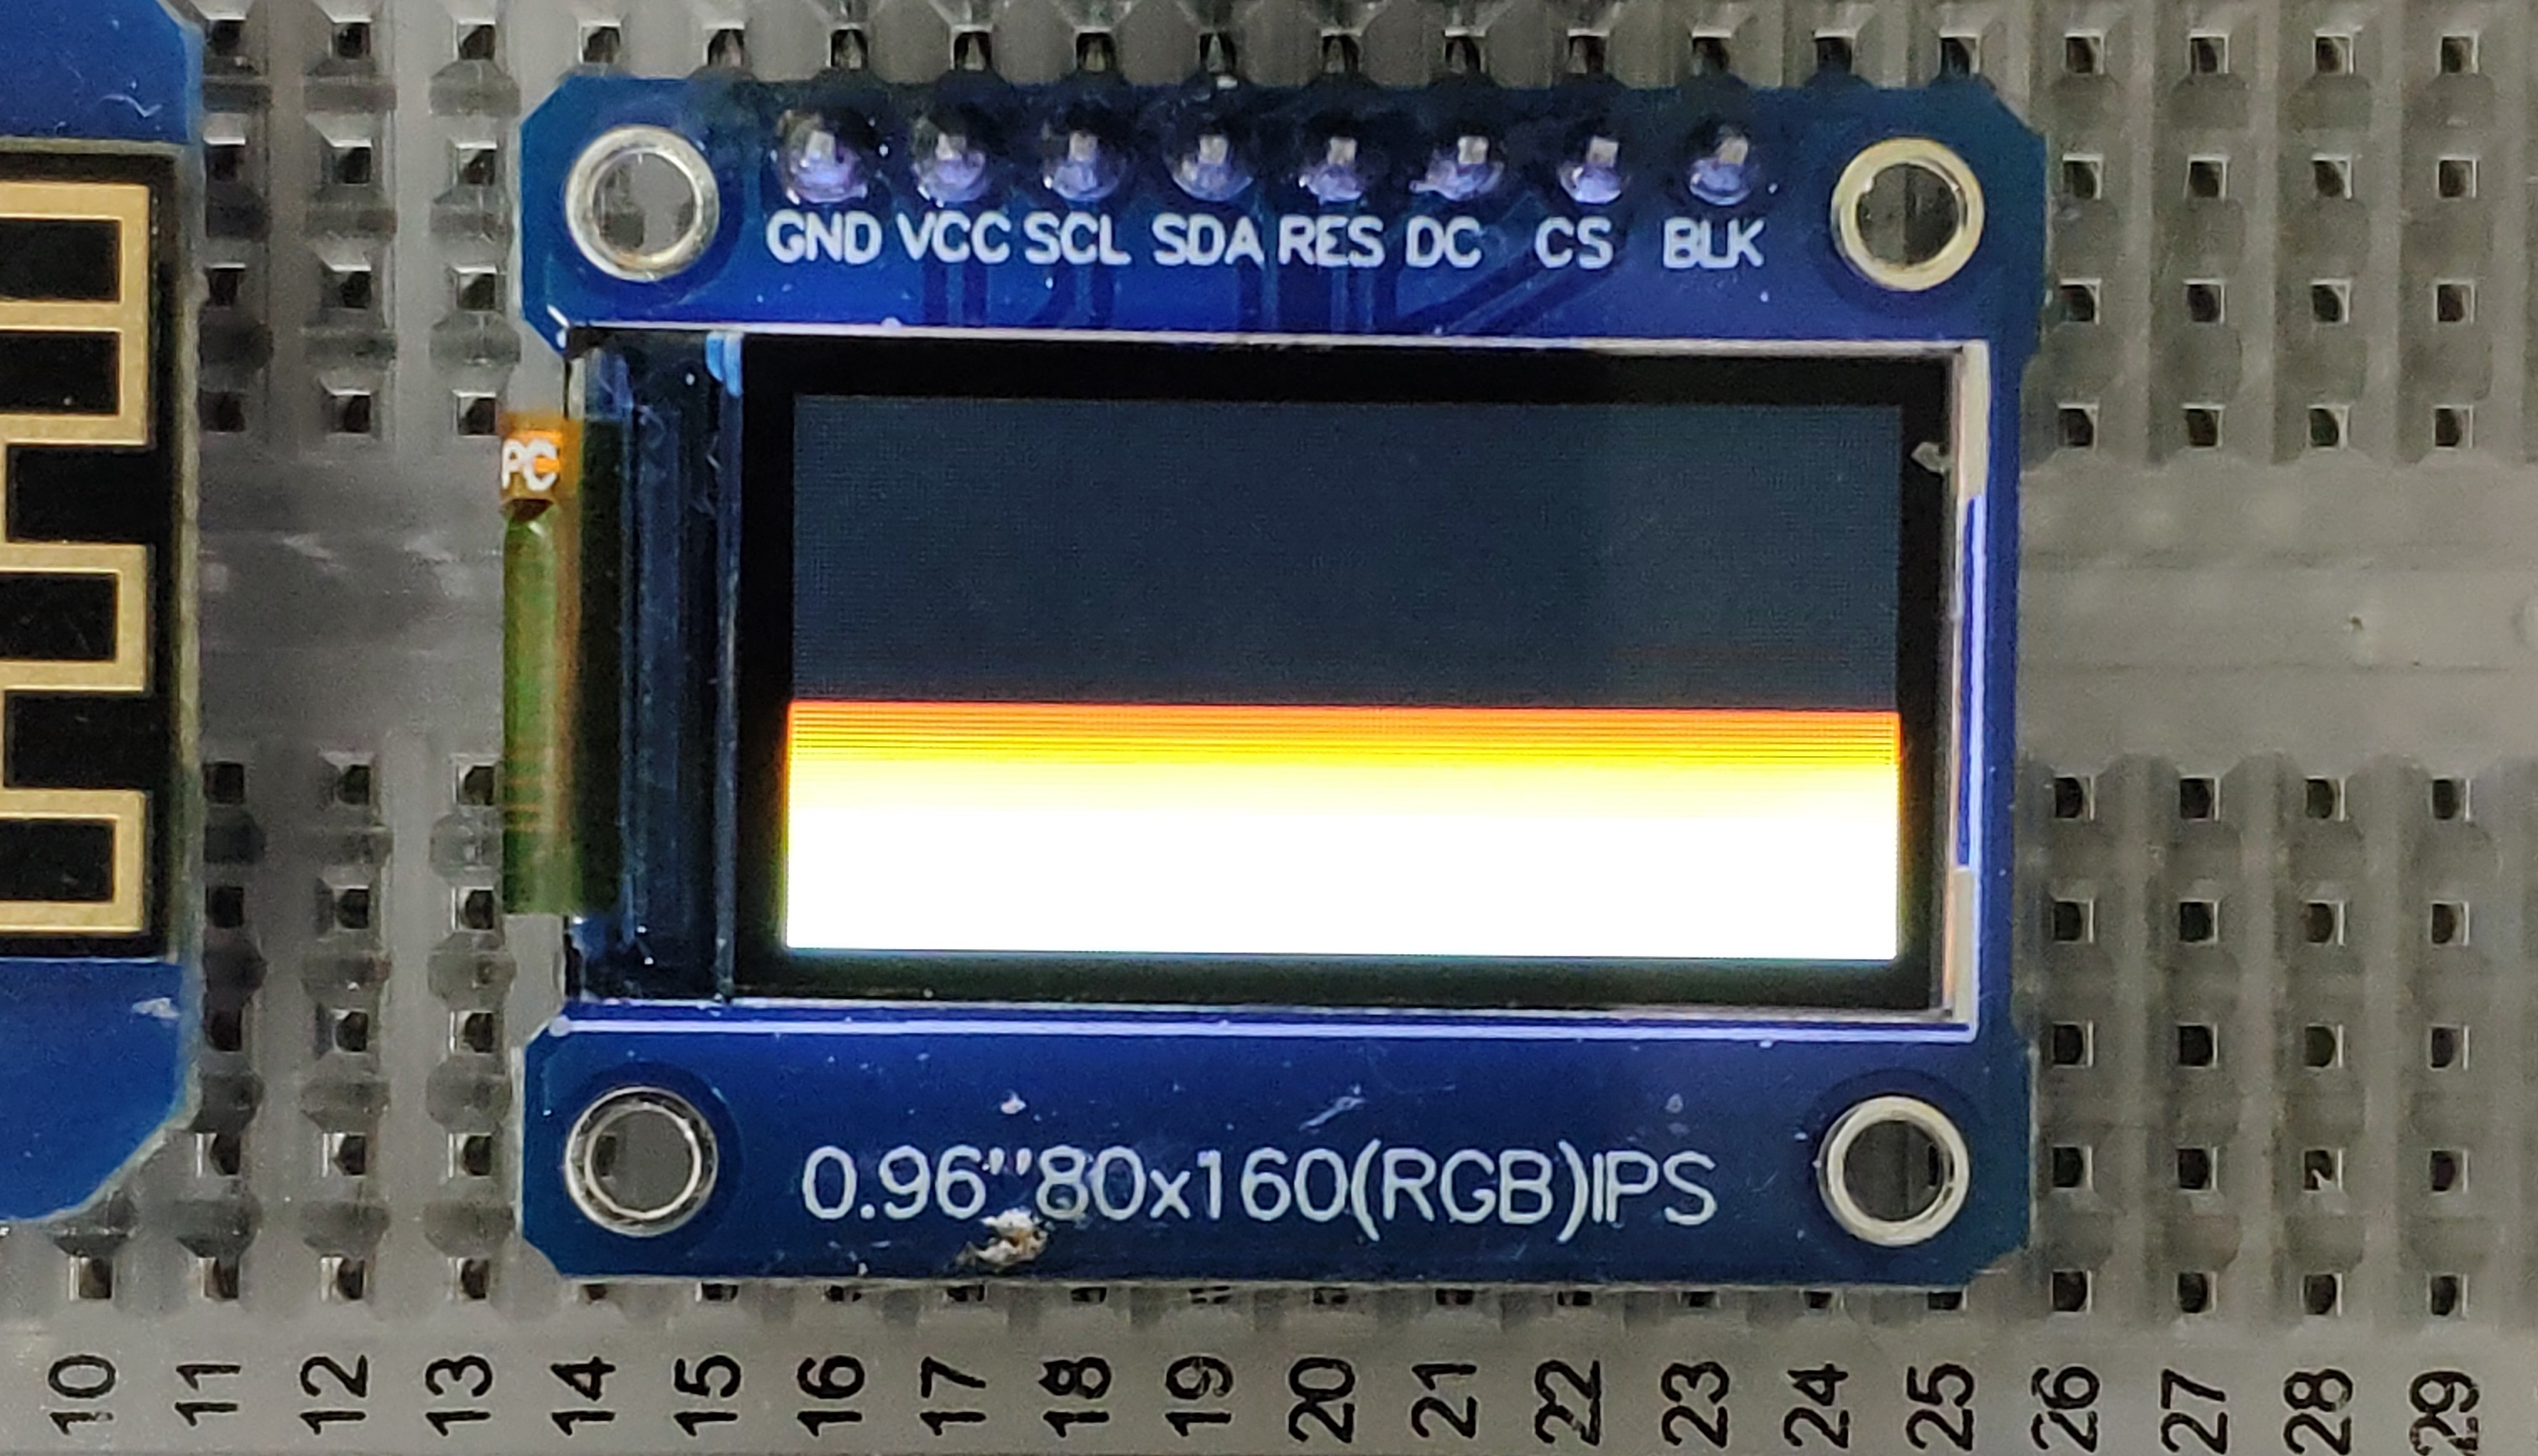
- 0.96” 80x160 (RGB) IPS TFT Display (ST7735S) (I bought this one)
- 9 cables + bread board
- Build with PlatformIO or Arduino (rename
main.cpptosomething.ino) - Libraries: Make sure you have
Adafruit ST7735 and ST7789 LibraryandAdafruit GFX Libraryinstalled - C++ Source Code: arduino-fireanim-v1.zip
If you want a step by step guide, and understand how I came up with the code, continue to read.
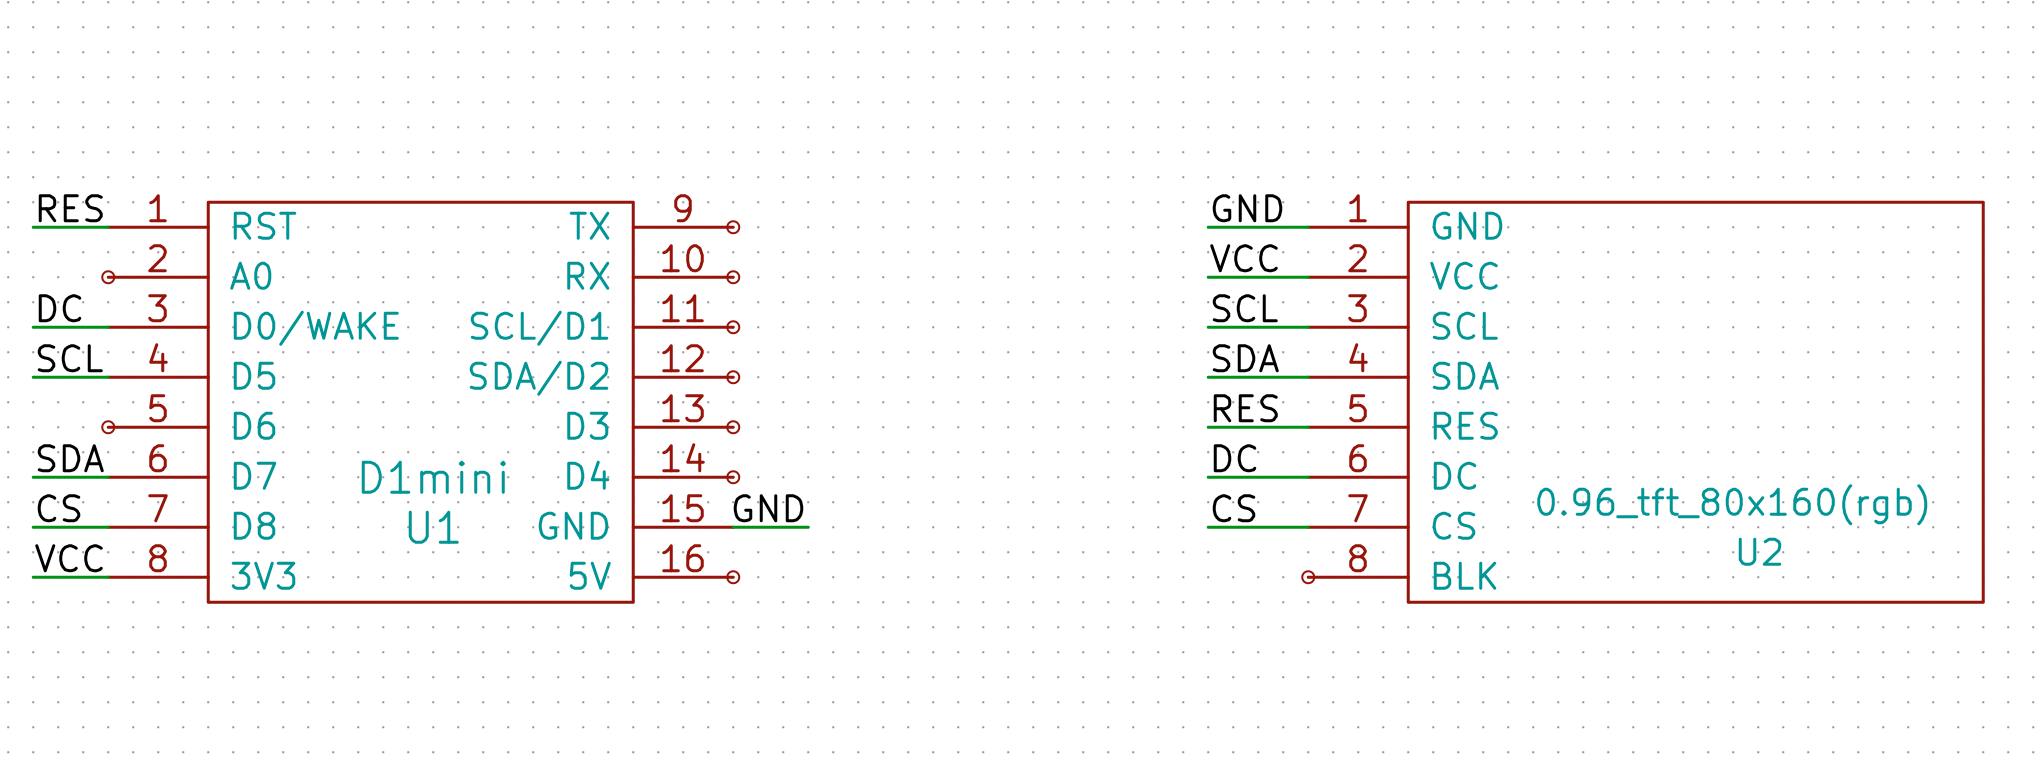
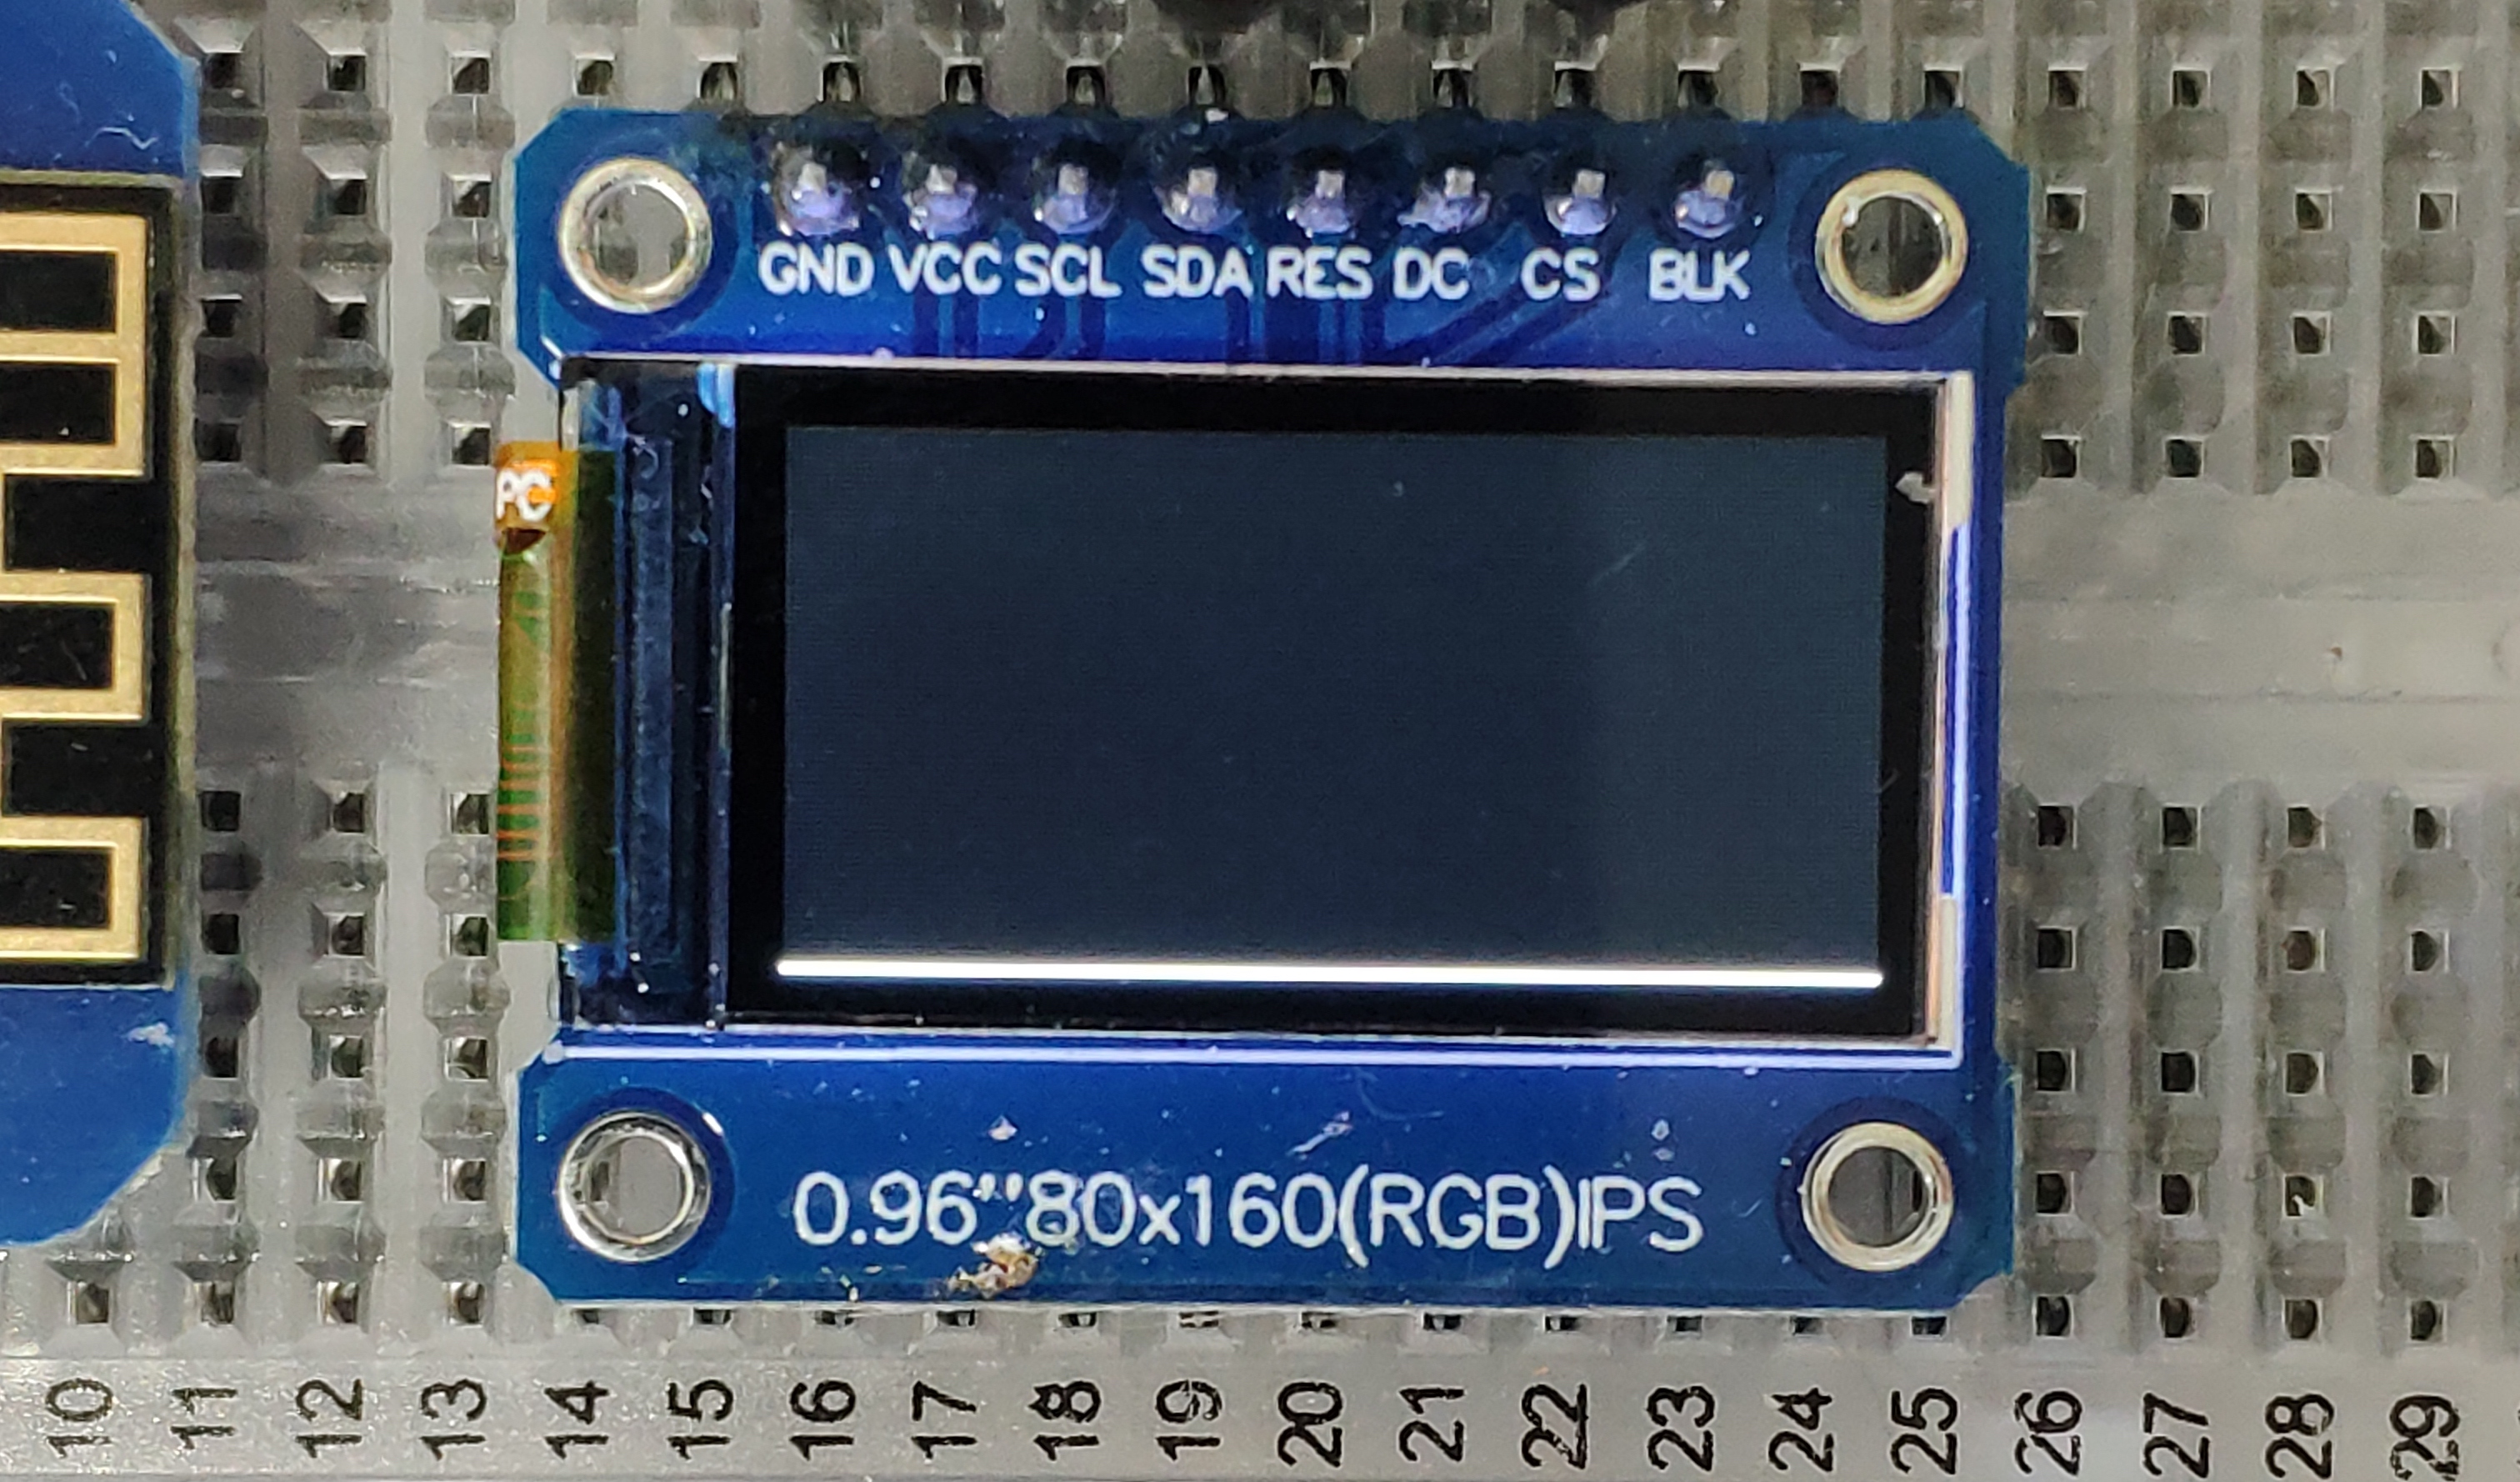
Hardware Setup
This section will show how to connect everything on a bread board. A small 30 row bread board is sufficient, and you will need 9 cables to connect everything.
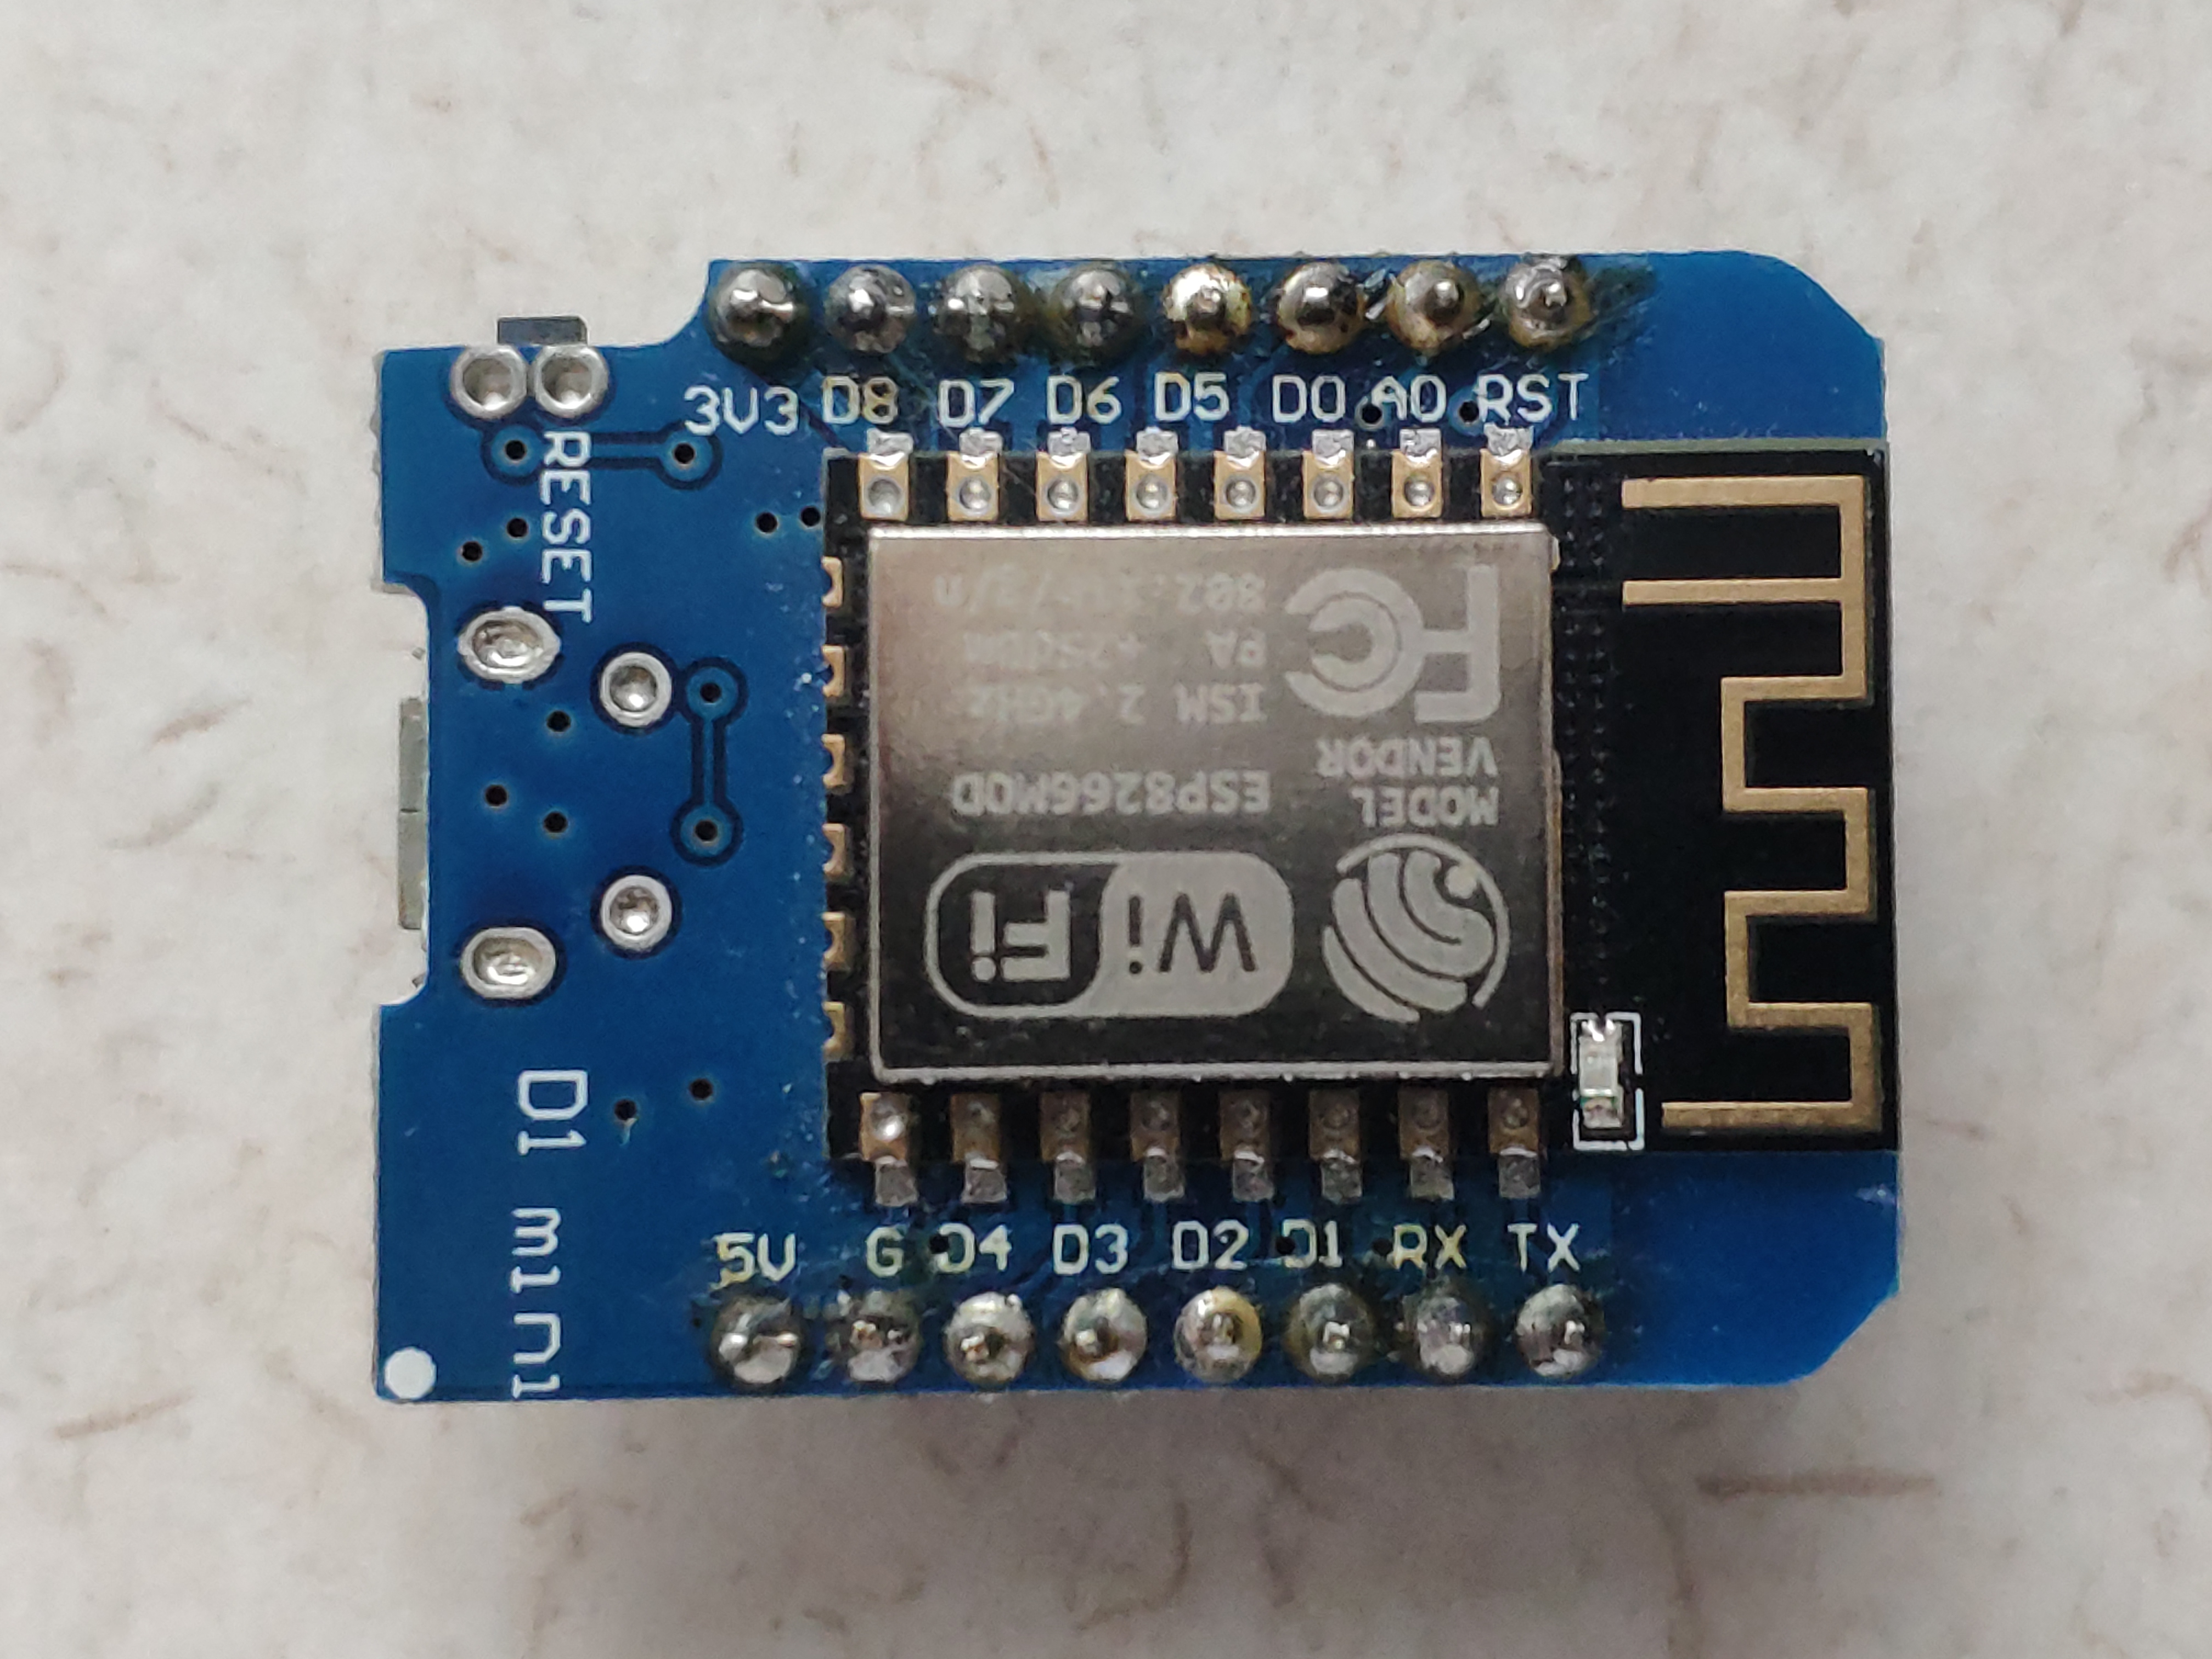
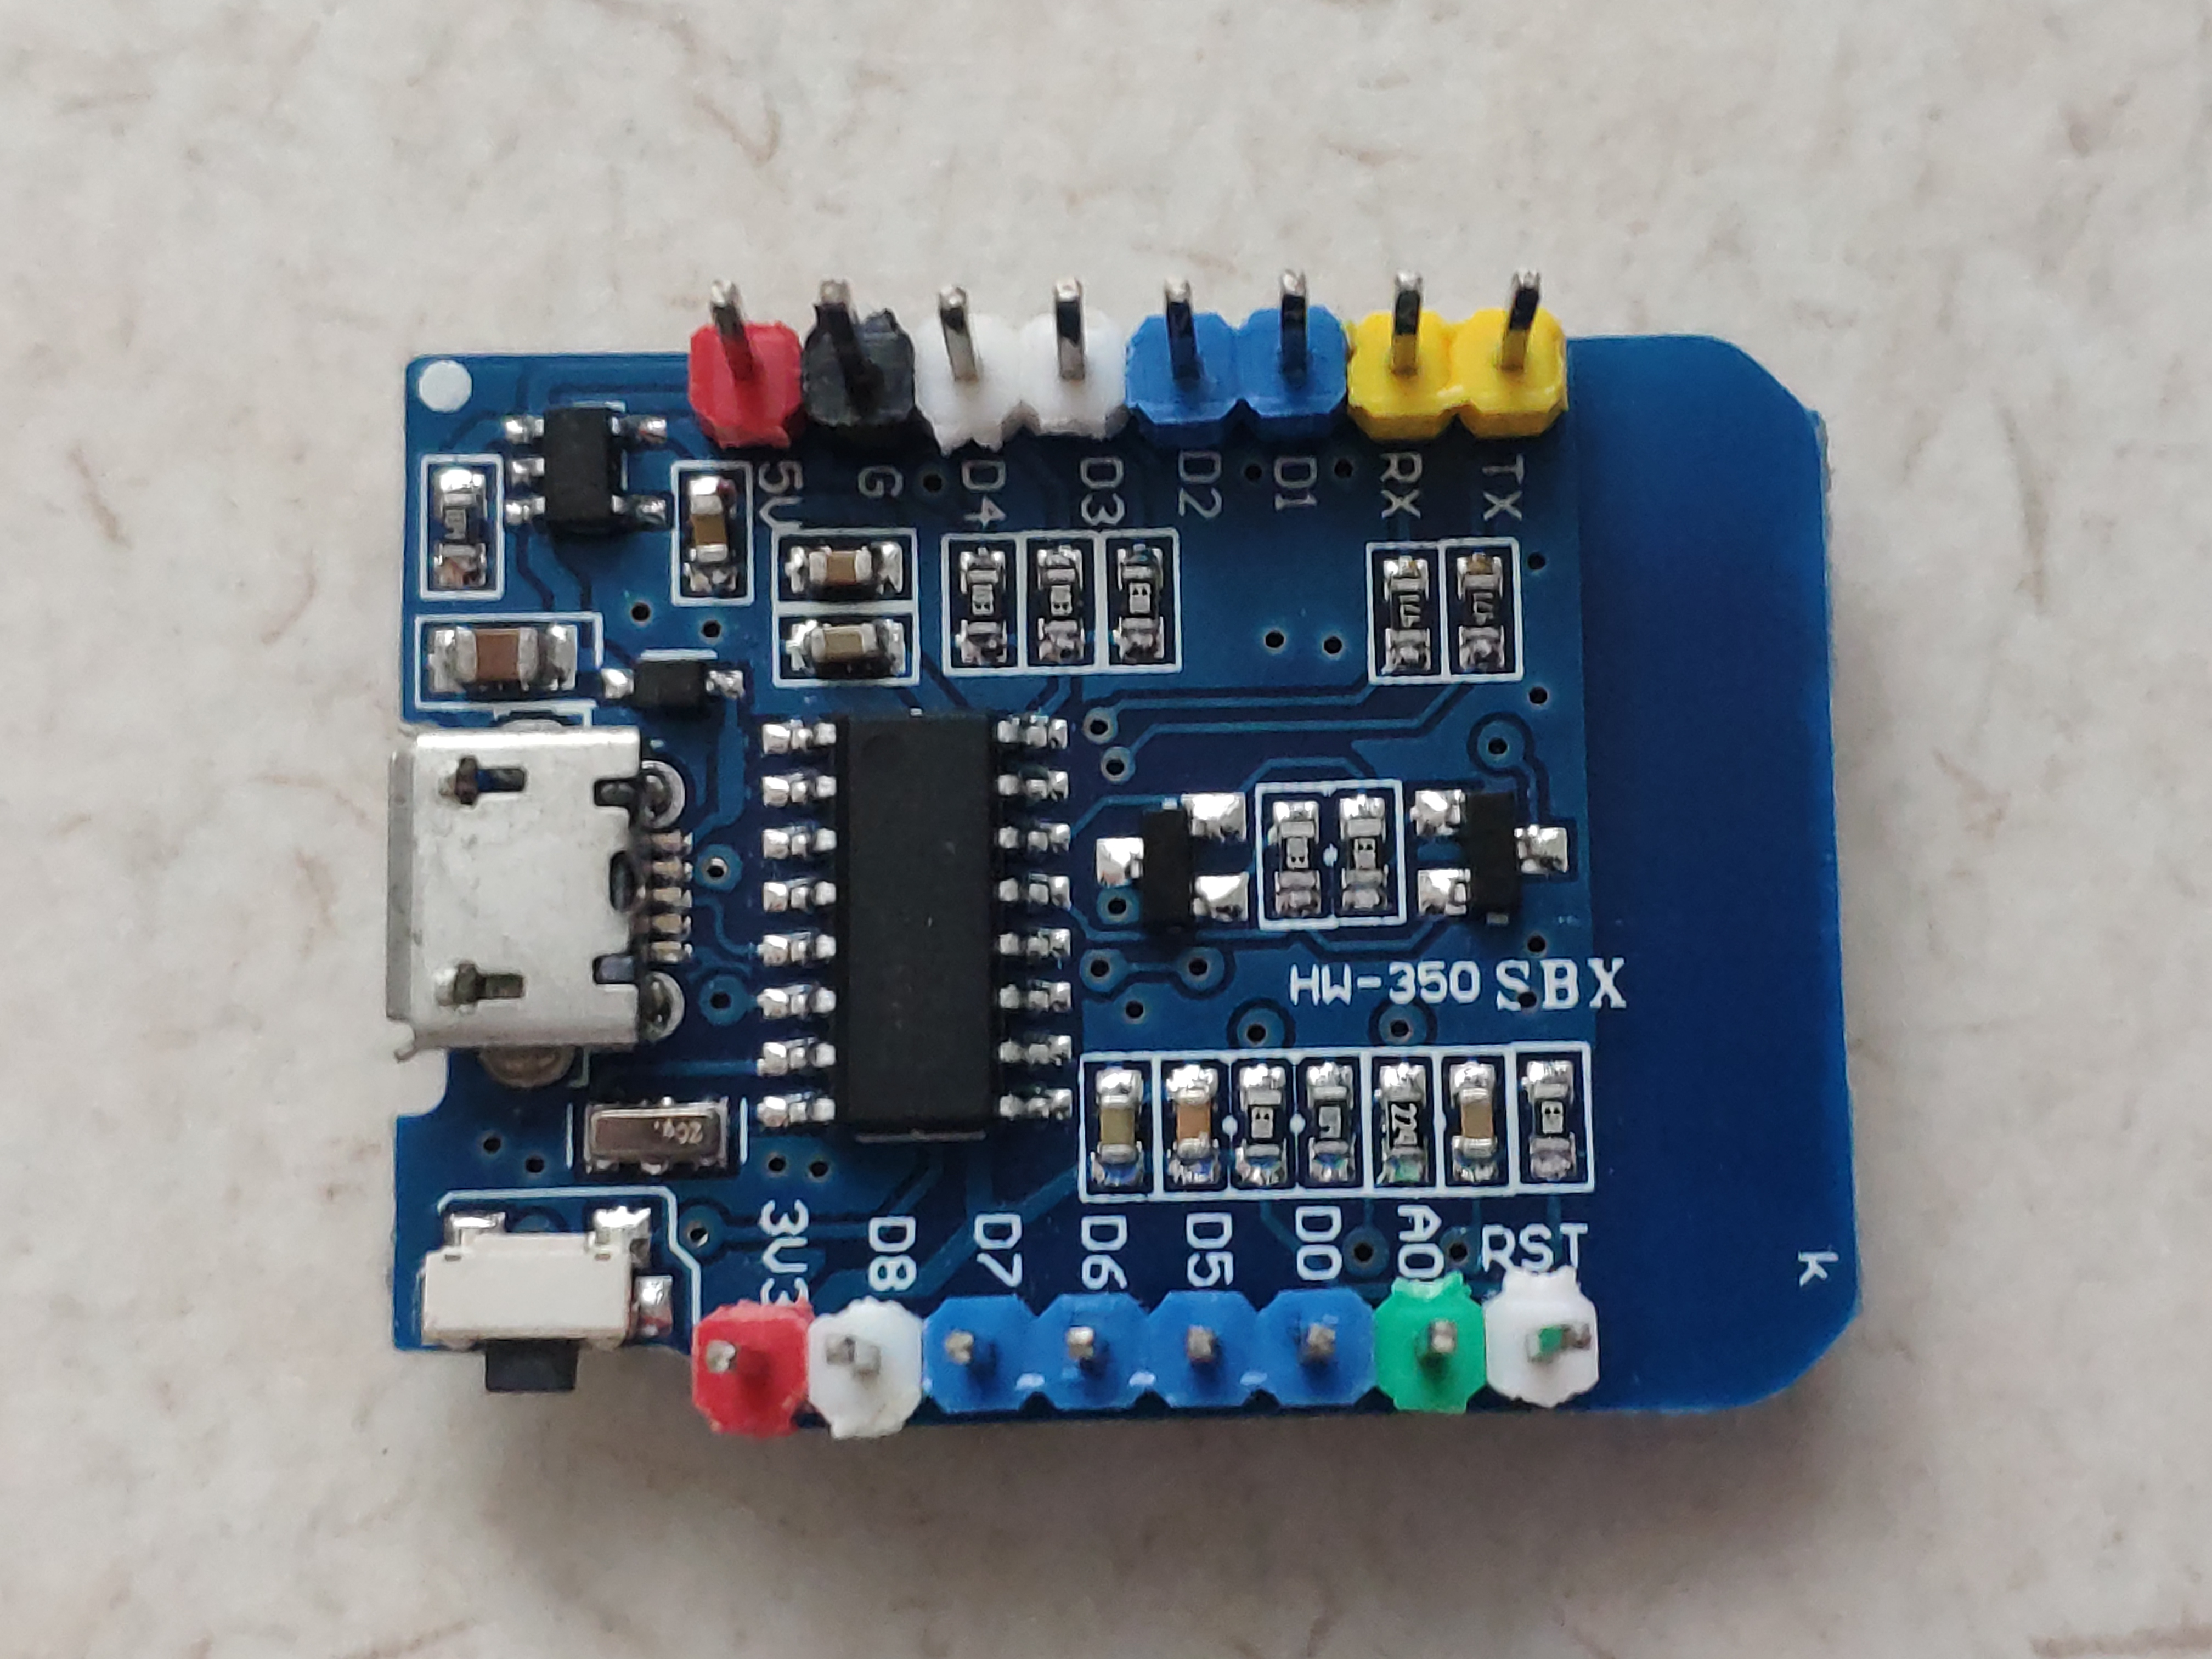
- red: power
- black: GND
- yellow: serial RX/TX
- green: analog in
- blue: GPIO that are OK to use
- white: special pins, most of them GPIO, but they mess with the flash/boot lifecycle or are connected to the onboard LED, so read the datasheet before using 🤓
- D1/D2 are blue but usually taken away by at least one I2C device. If you wan't to use deep sleep D0 is gone, too.

Important: If you buy a different one, make sure it has the Driver IC: ST7735, otherwise the libraries used in the example code wont work. It is possible to port the code though.

Hint: Remember the Color65K label for later ;)
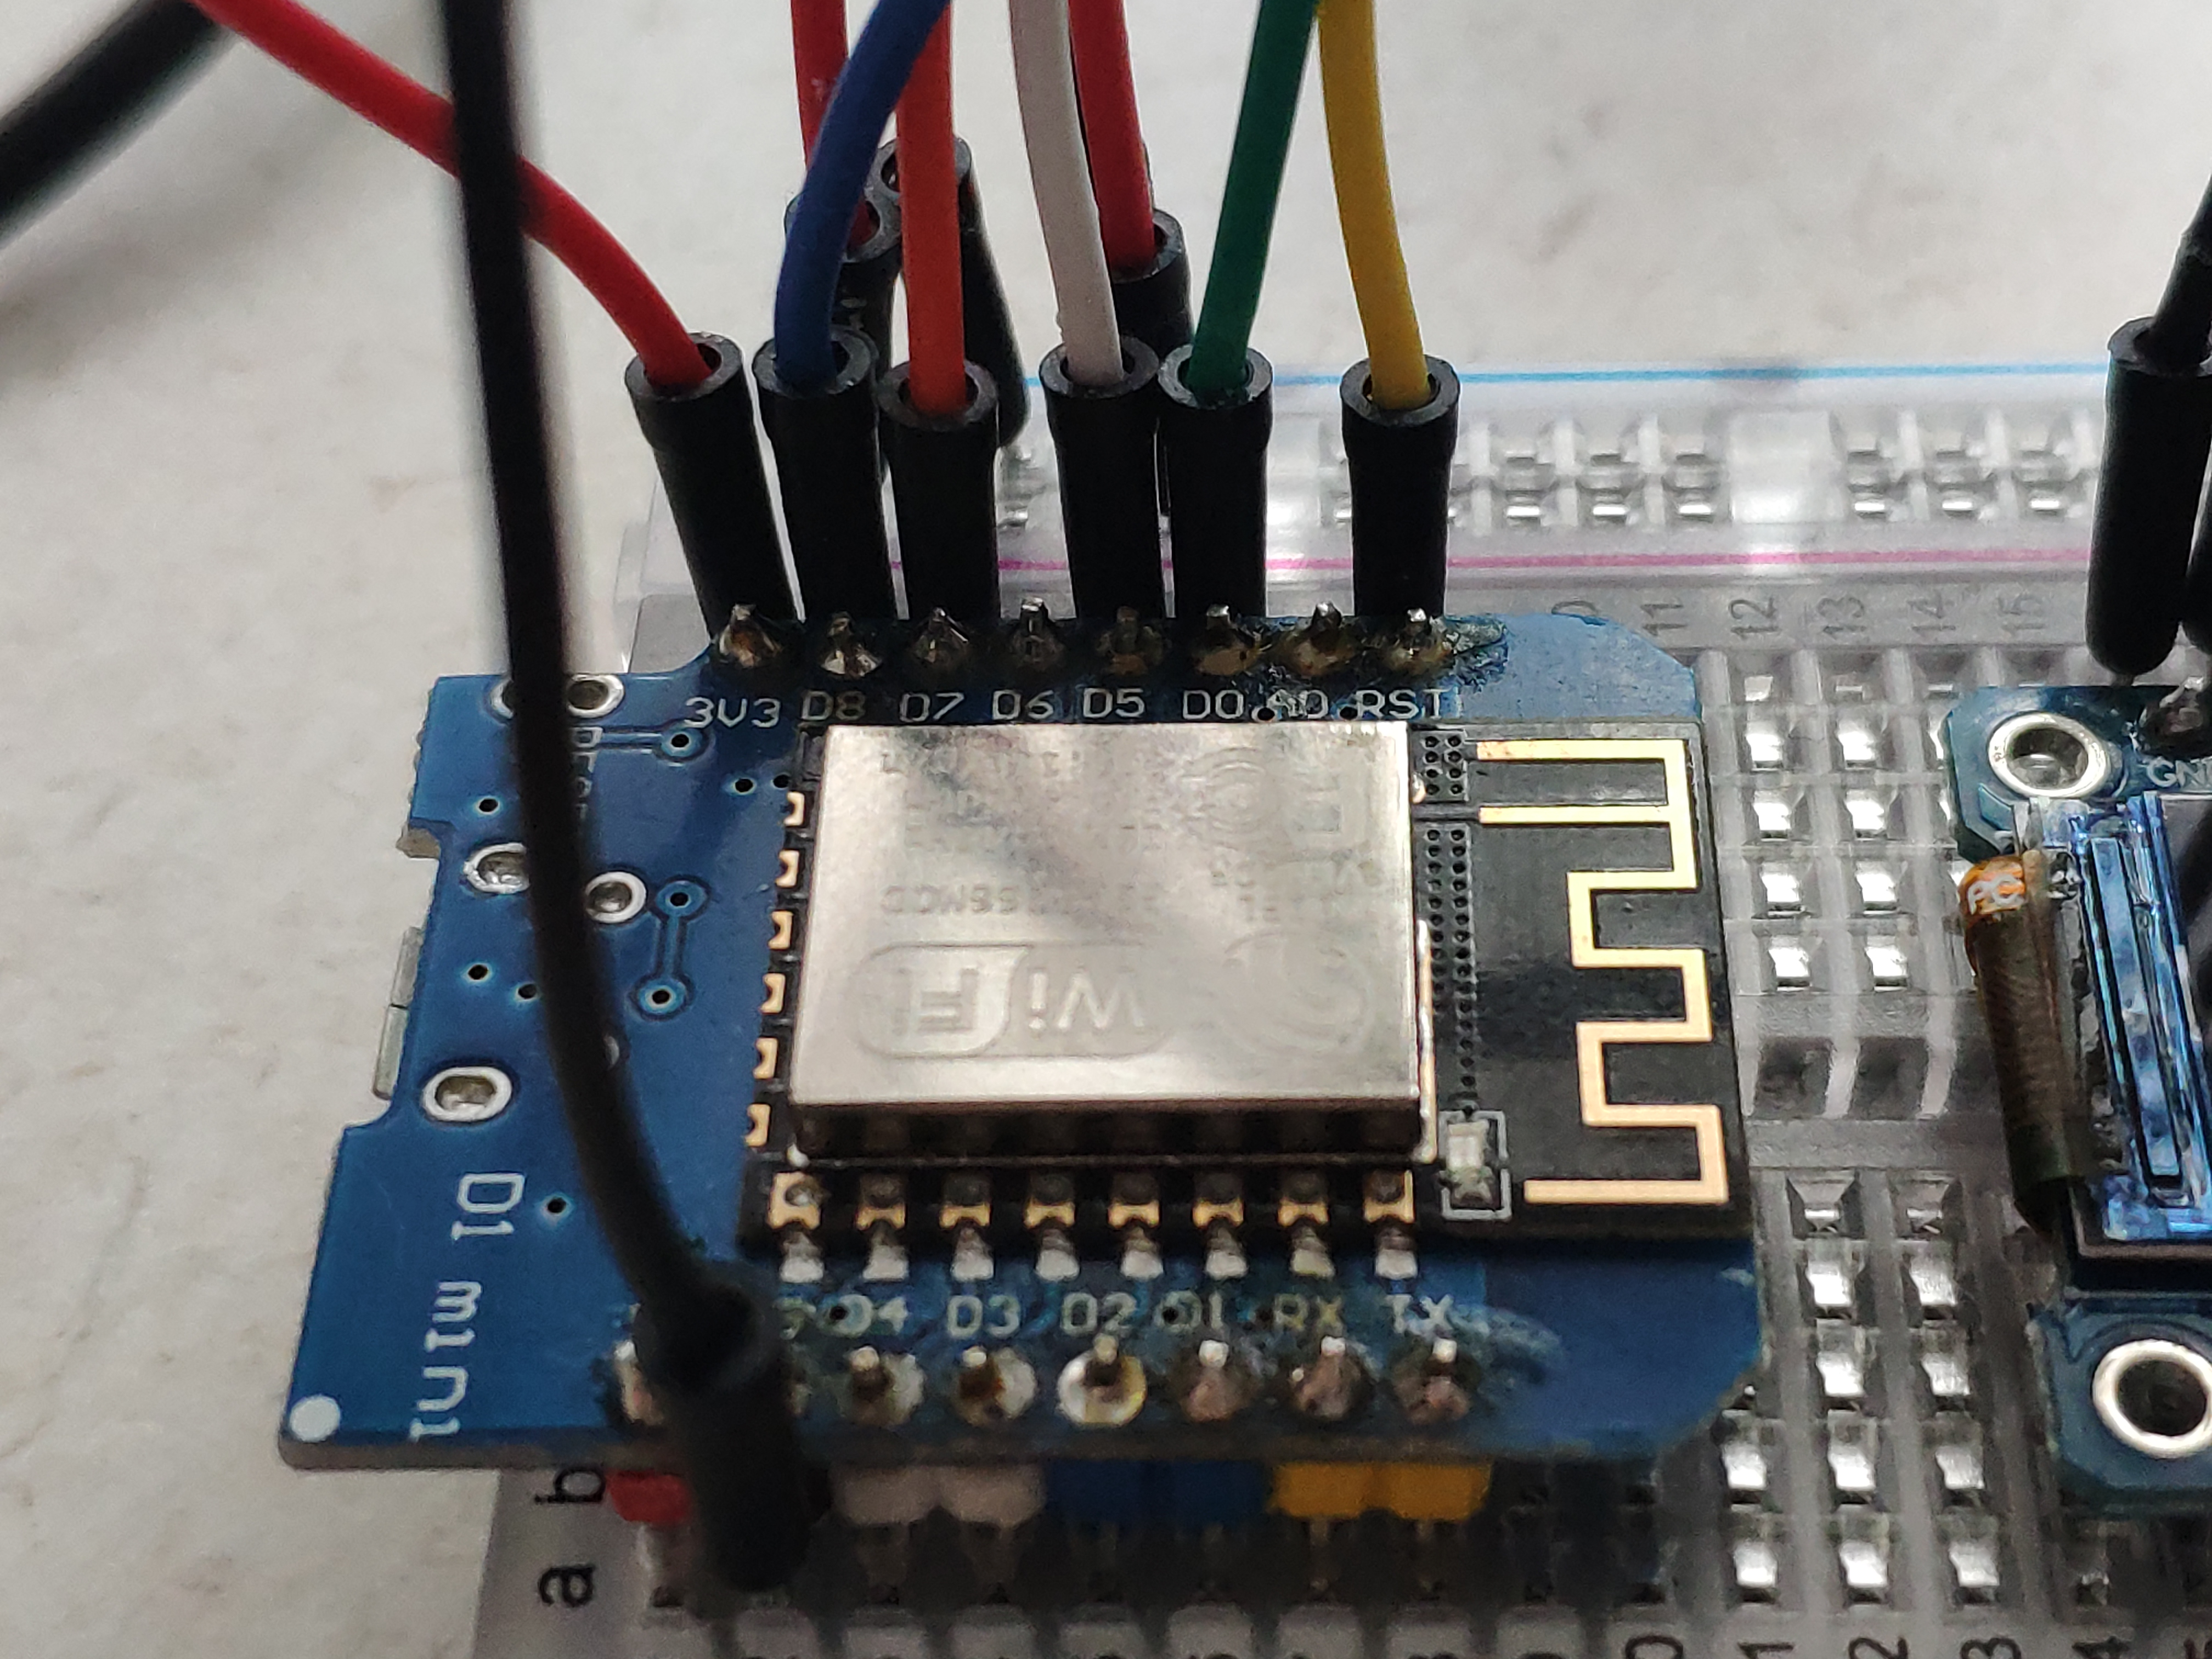
The other pins are mapped as follows:
- D8 - CS
- D7 - SDA
- D5 - SCL
- D0 - DC
- RST - RES
I leaft BLK floating.

Step by Step to a flame animation
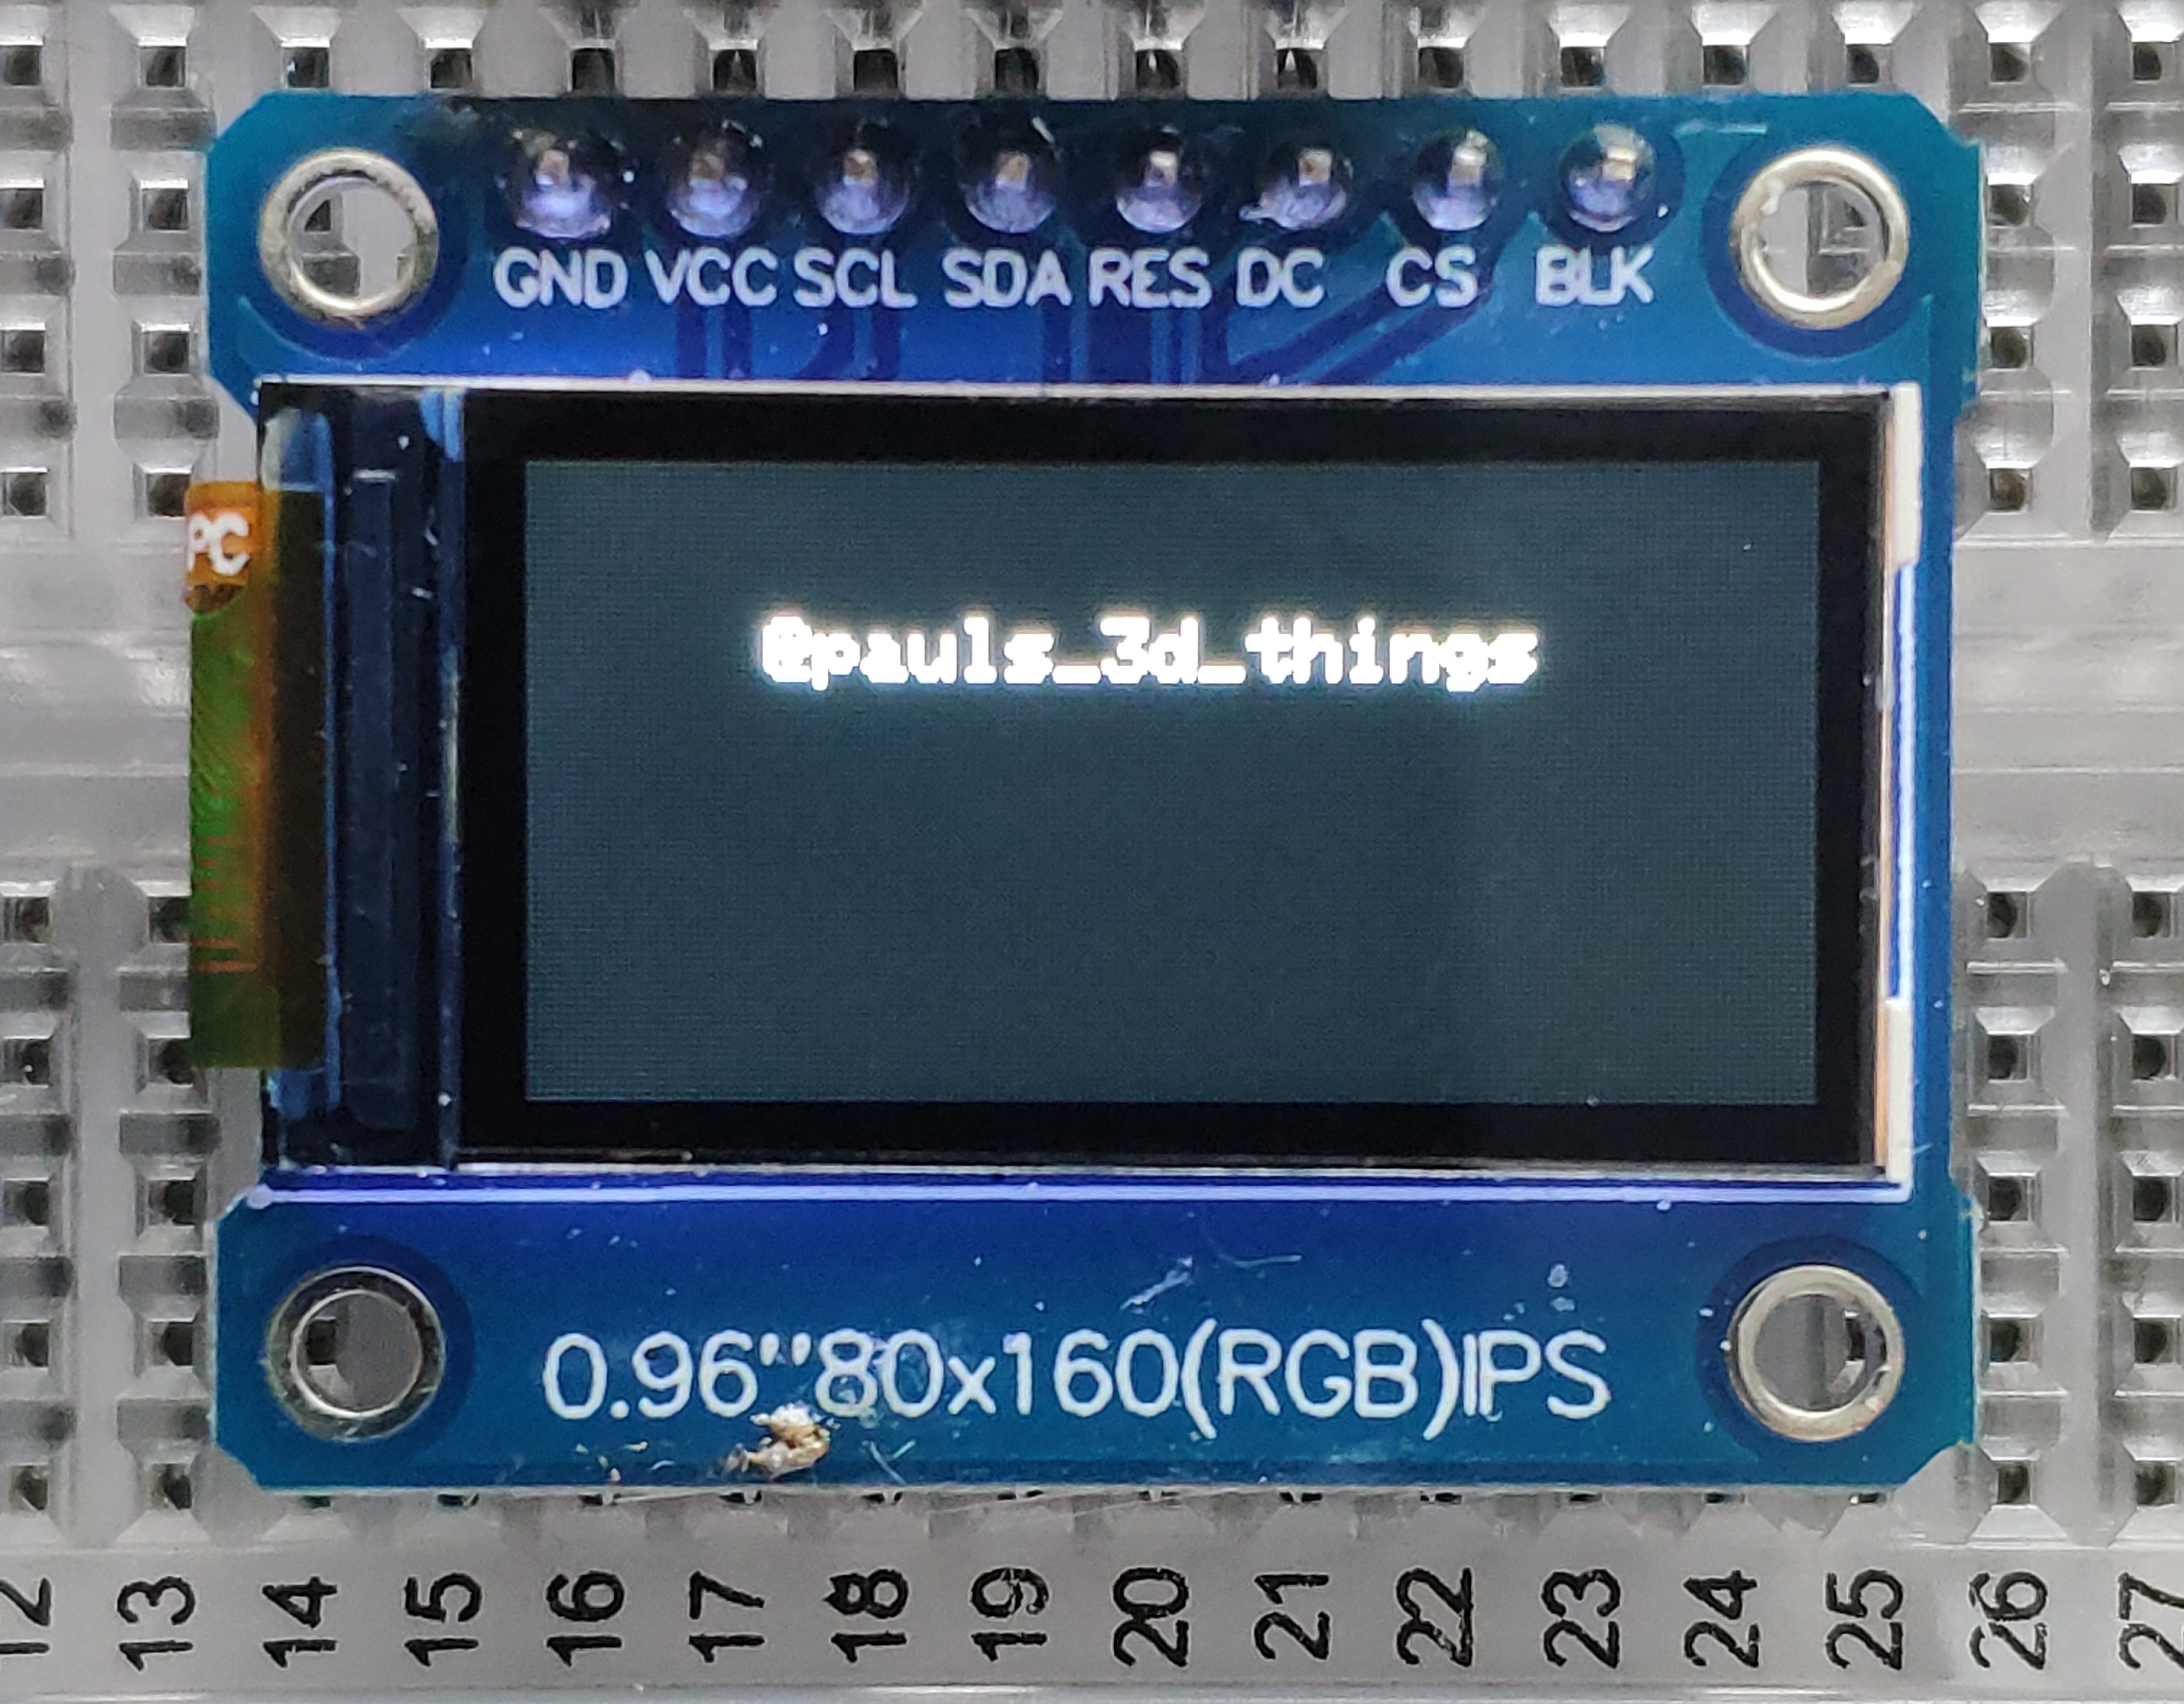
This is the initial code to get things to run and verify the display works:
#include <Adafruit_GFX.h>
#include <Adafruit_ST7735.h>
#include <Arduino.h>

Adafruit_ST7735 tft = Adafruit_ST7735(D8, D0, -1);

void setup(void) {
  tft.initR(INITR_MINI160x80);
  tft.fillScreen(ST77XX_BLACK);
}

void loop(void) {
  tft.setCursor(30, 20);
  tft.setTextSize(1);
  tft.setTextColor(ST77XX_WHITE);
  tft.print("@pauls_3d_things");
}

We achieve this by modifying the setup, and adding the line tft.setRotation(3):
void setup(void) {
  tft.initR(INITR_MINI160x80);
  tft.setRotation(3);
  tft.fillScreen(ST77XX_BLACK);
}
This is usually already enough for most tiny IoT projects that draw a few sensor values to the screen ;)
Next, we want to know what the fastest way is to fill the screen with pixels (see my previous related post with some details). This is achieved by writing the pixel data directly to the video memory of the display (which is exactly what we see on the display). The way of doing this with an ST7735 display IC is with the following protocol:
tft.startWrite()begin the transactiontft.setAddrWindo(x,y,w,h)let the display IC know where exactly we want to send data to. In this case the rectangle at locationx = 0,y = 0(top left corner), with a widthw = 160, and a heighth=80(the dimensions of the display) a.k.a. fullscreen.tftWritePixel(c)set the pixel at locationx/y(loops) to a given colorctft.endWrite()finish the transaction
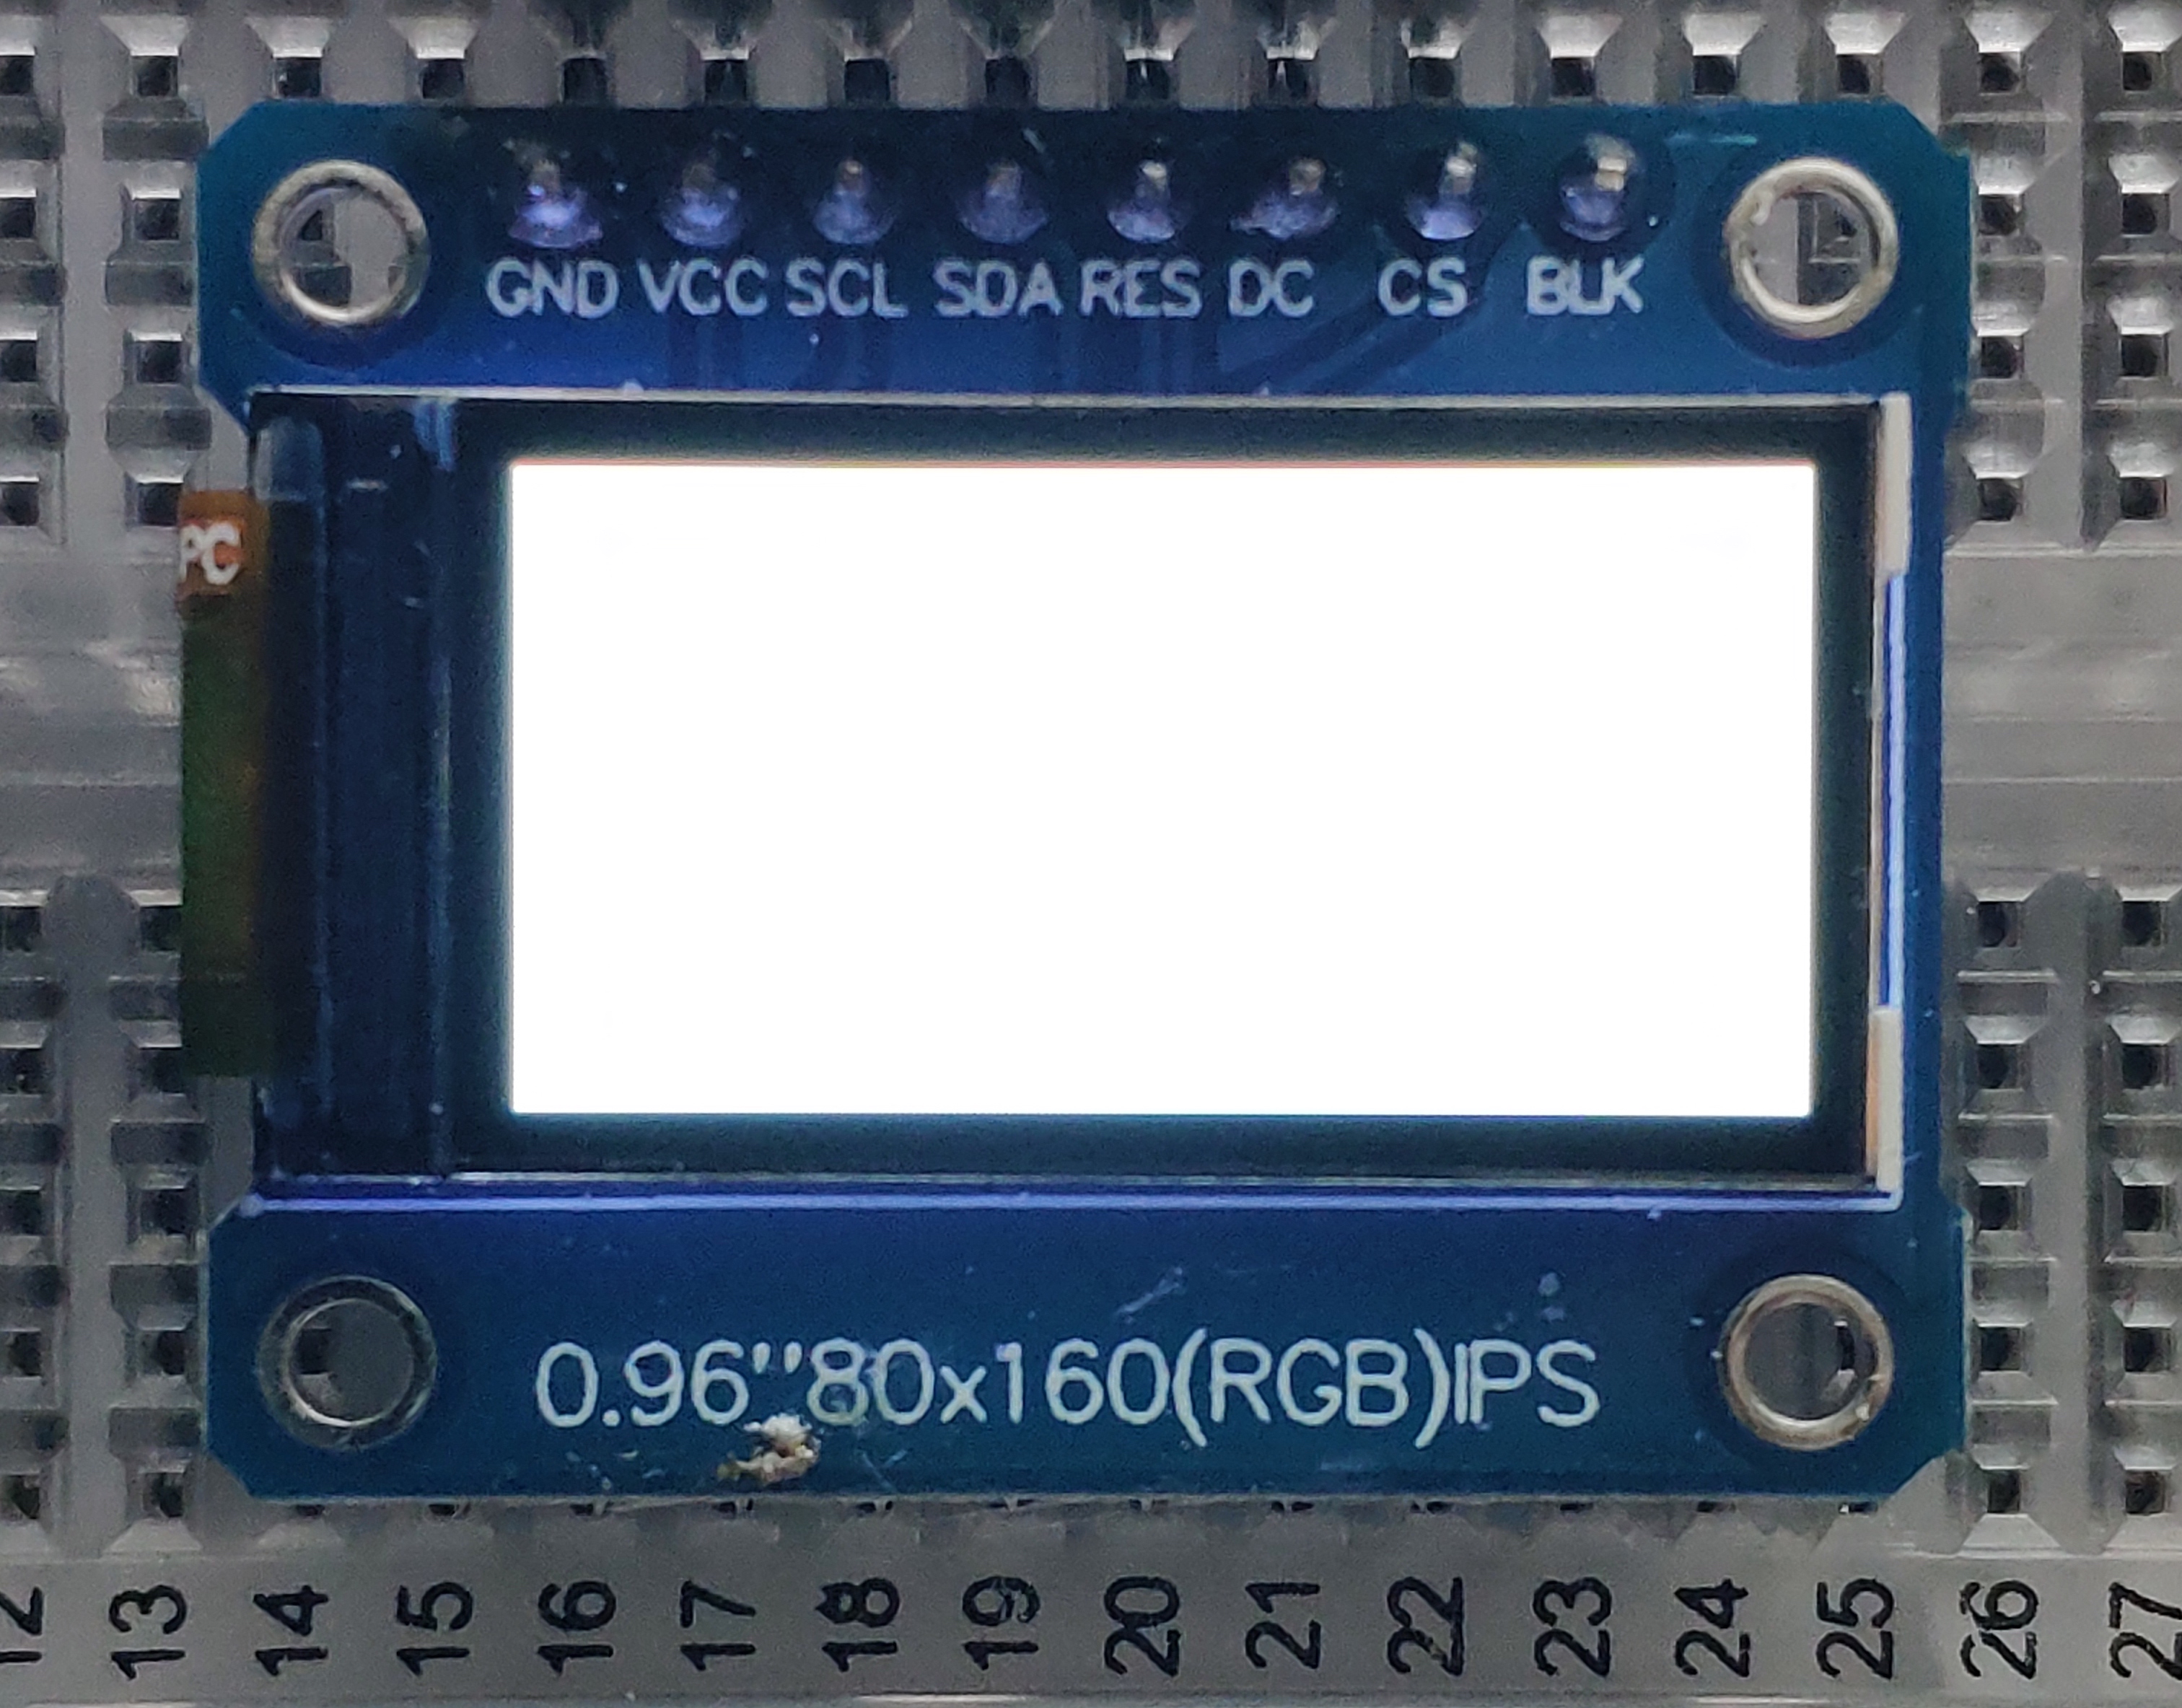
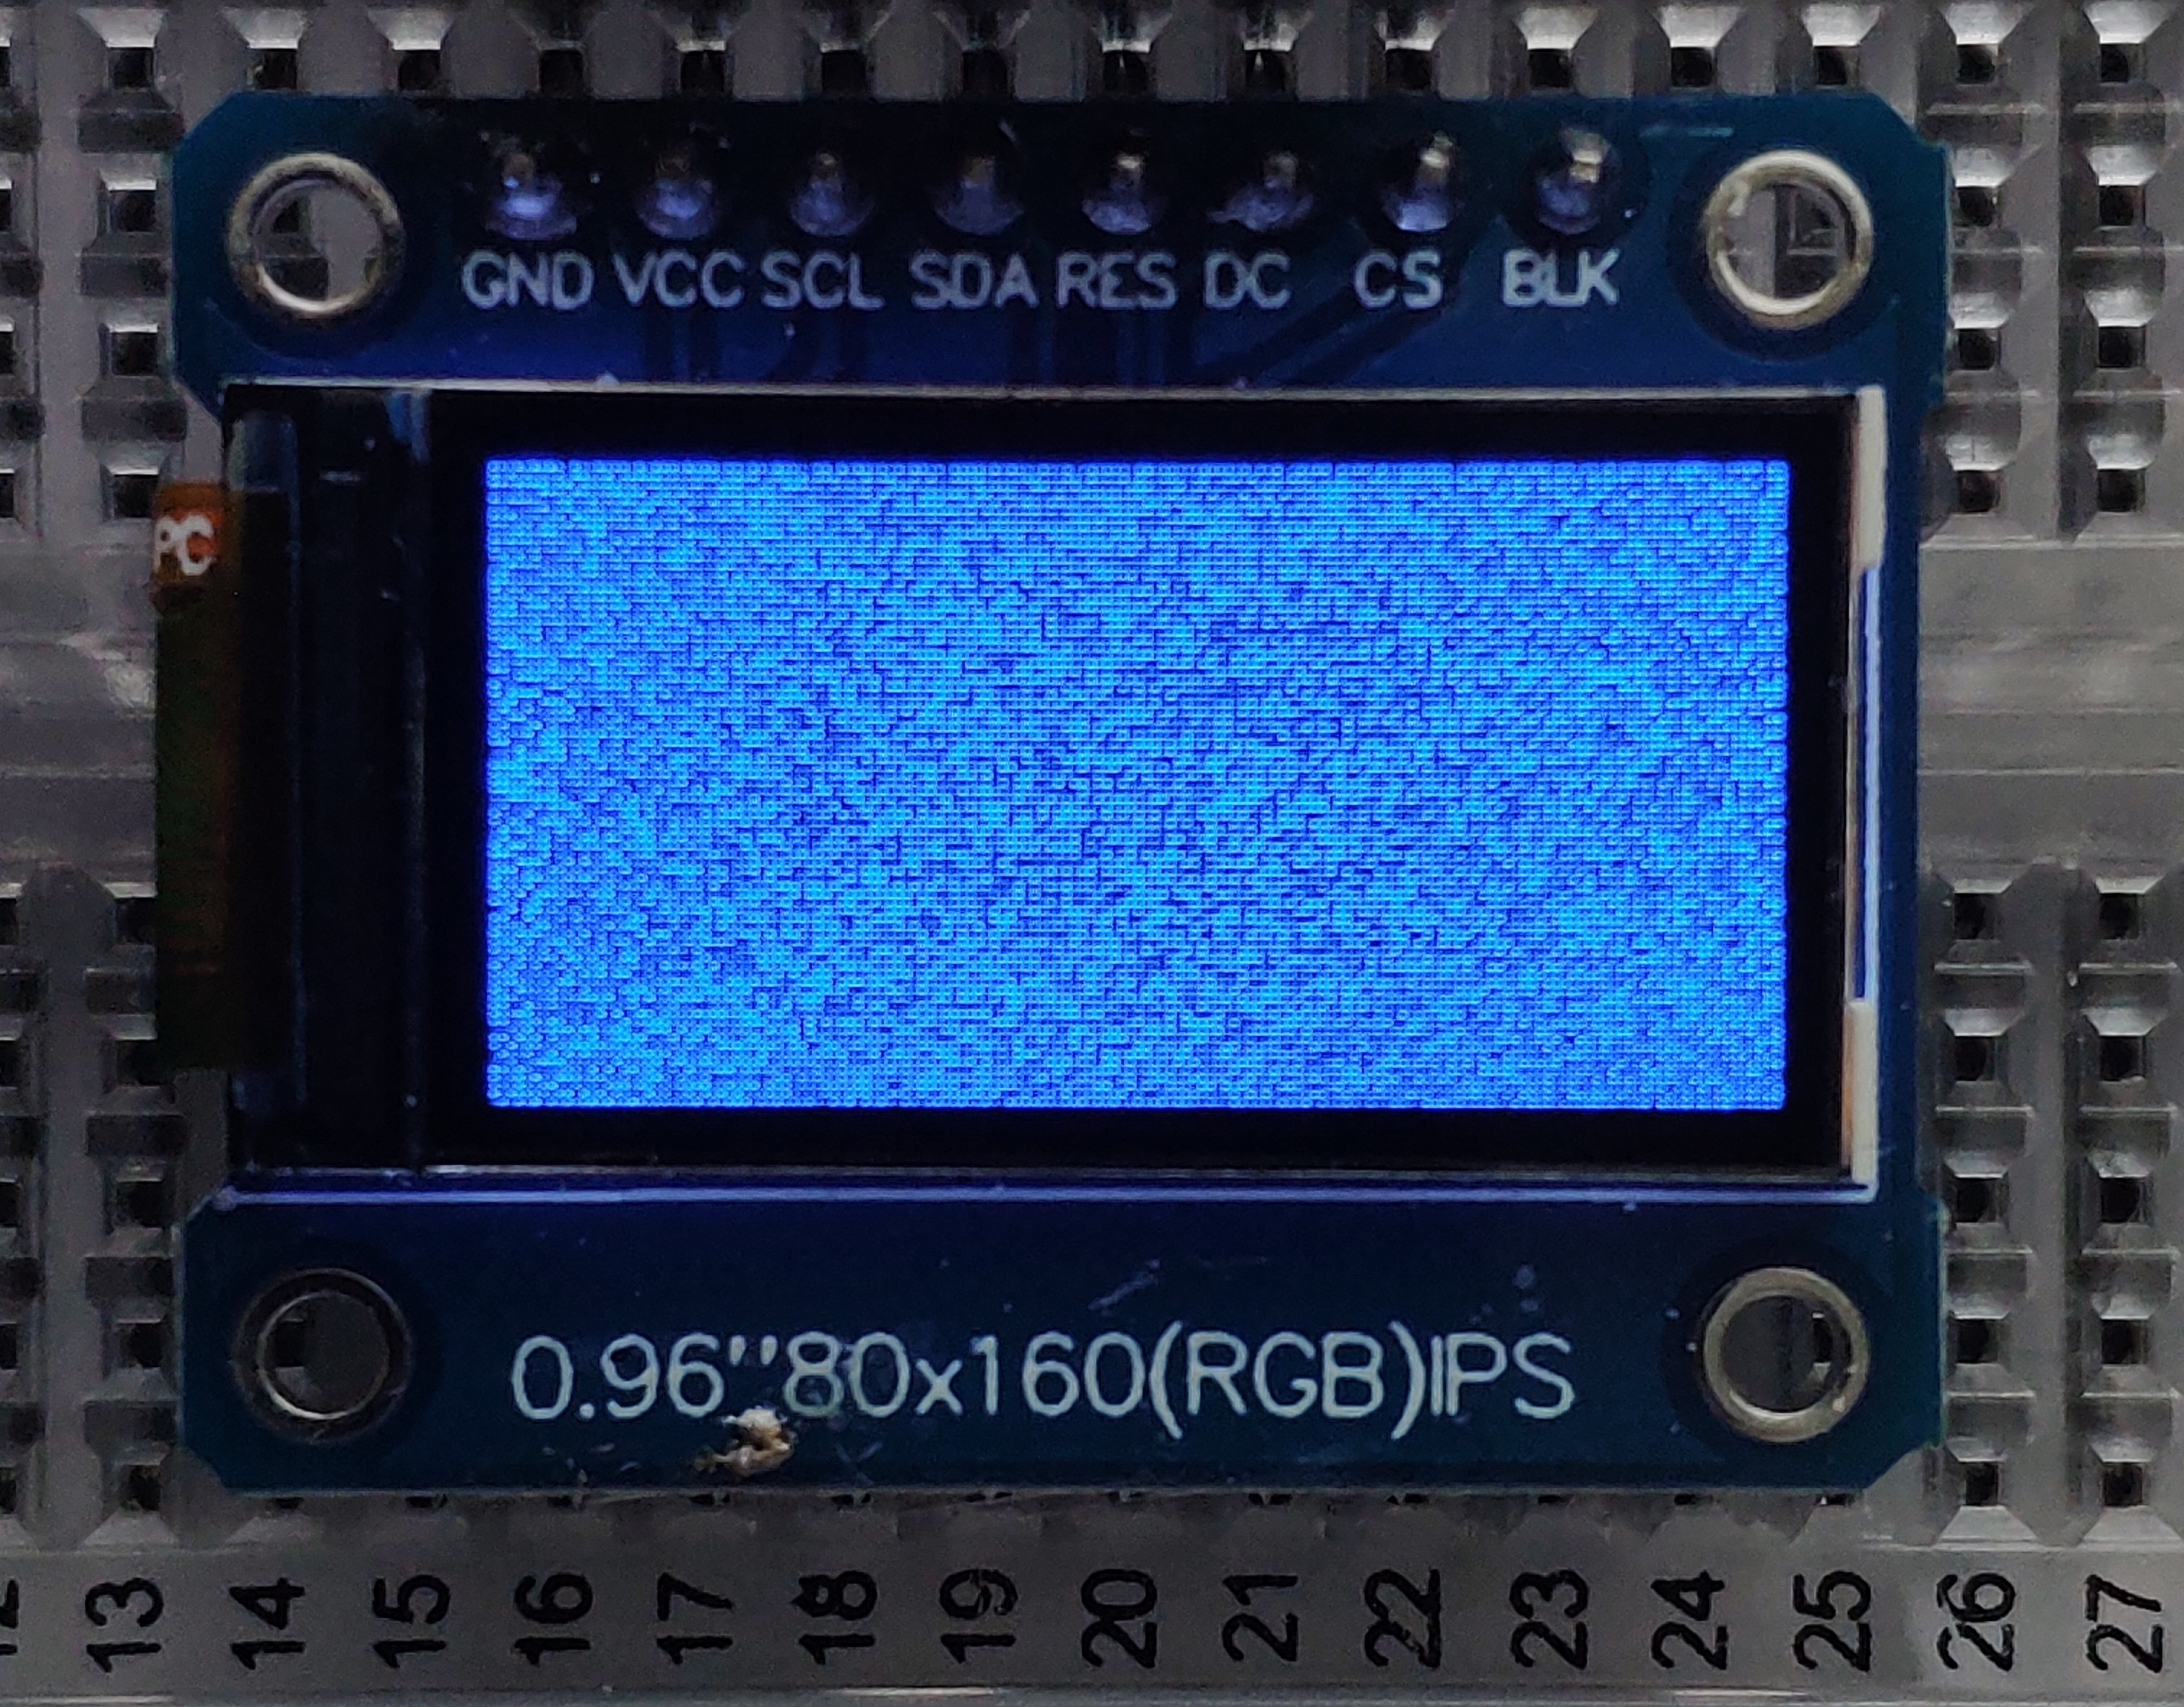
We change the loop to the following:
void loop(void) {
  tft.startWrite();
  tft.setAddrWindow(0, 0, 160, 80);
  for (uint8_t y = 0; y < 80; y++) {
    for (uint8_t x = 0; x < 160; x++) {
      tft.writePixel(ST77XX_WHITE);
    }
  }
  tft.endWrite();
}
Let’s add some red random noise.
tft.color565(r,g,b)create a 16bit integer from an RGB value to address the pixel in it’s 16bit color space. See the Wiki entry on High_color for more details. (Remember the label Color65k from above?)
void loop(void) {
  tft.startWrite();
  tft.setAddrWindow(0, 0, 160, 80);
  for (uint8_t y = 0; y < 80; y++) {
    for (uint8_t x = 0; x < 160; x++) {
        tft.writePixel(tft.color565(random(255), 0, 0));
    }
  }
  tft.endWrite();
}
Because I was too lazy to figure out what I need to change in the settings of the display or in the initialization sequene to swap red and blue, I fixed it the lazy way:
// add this to the top of the source file:
#define rgb(r,g,b) tft.color565(b,g,r)
// then use it in draw loop:
tft.writePixel(rgb(random(255), 0, 0));
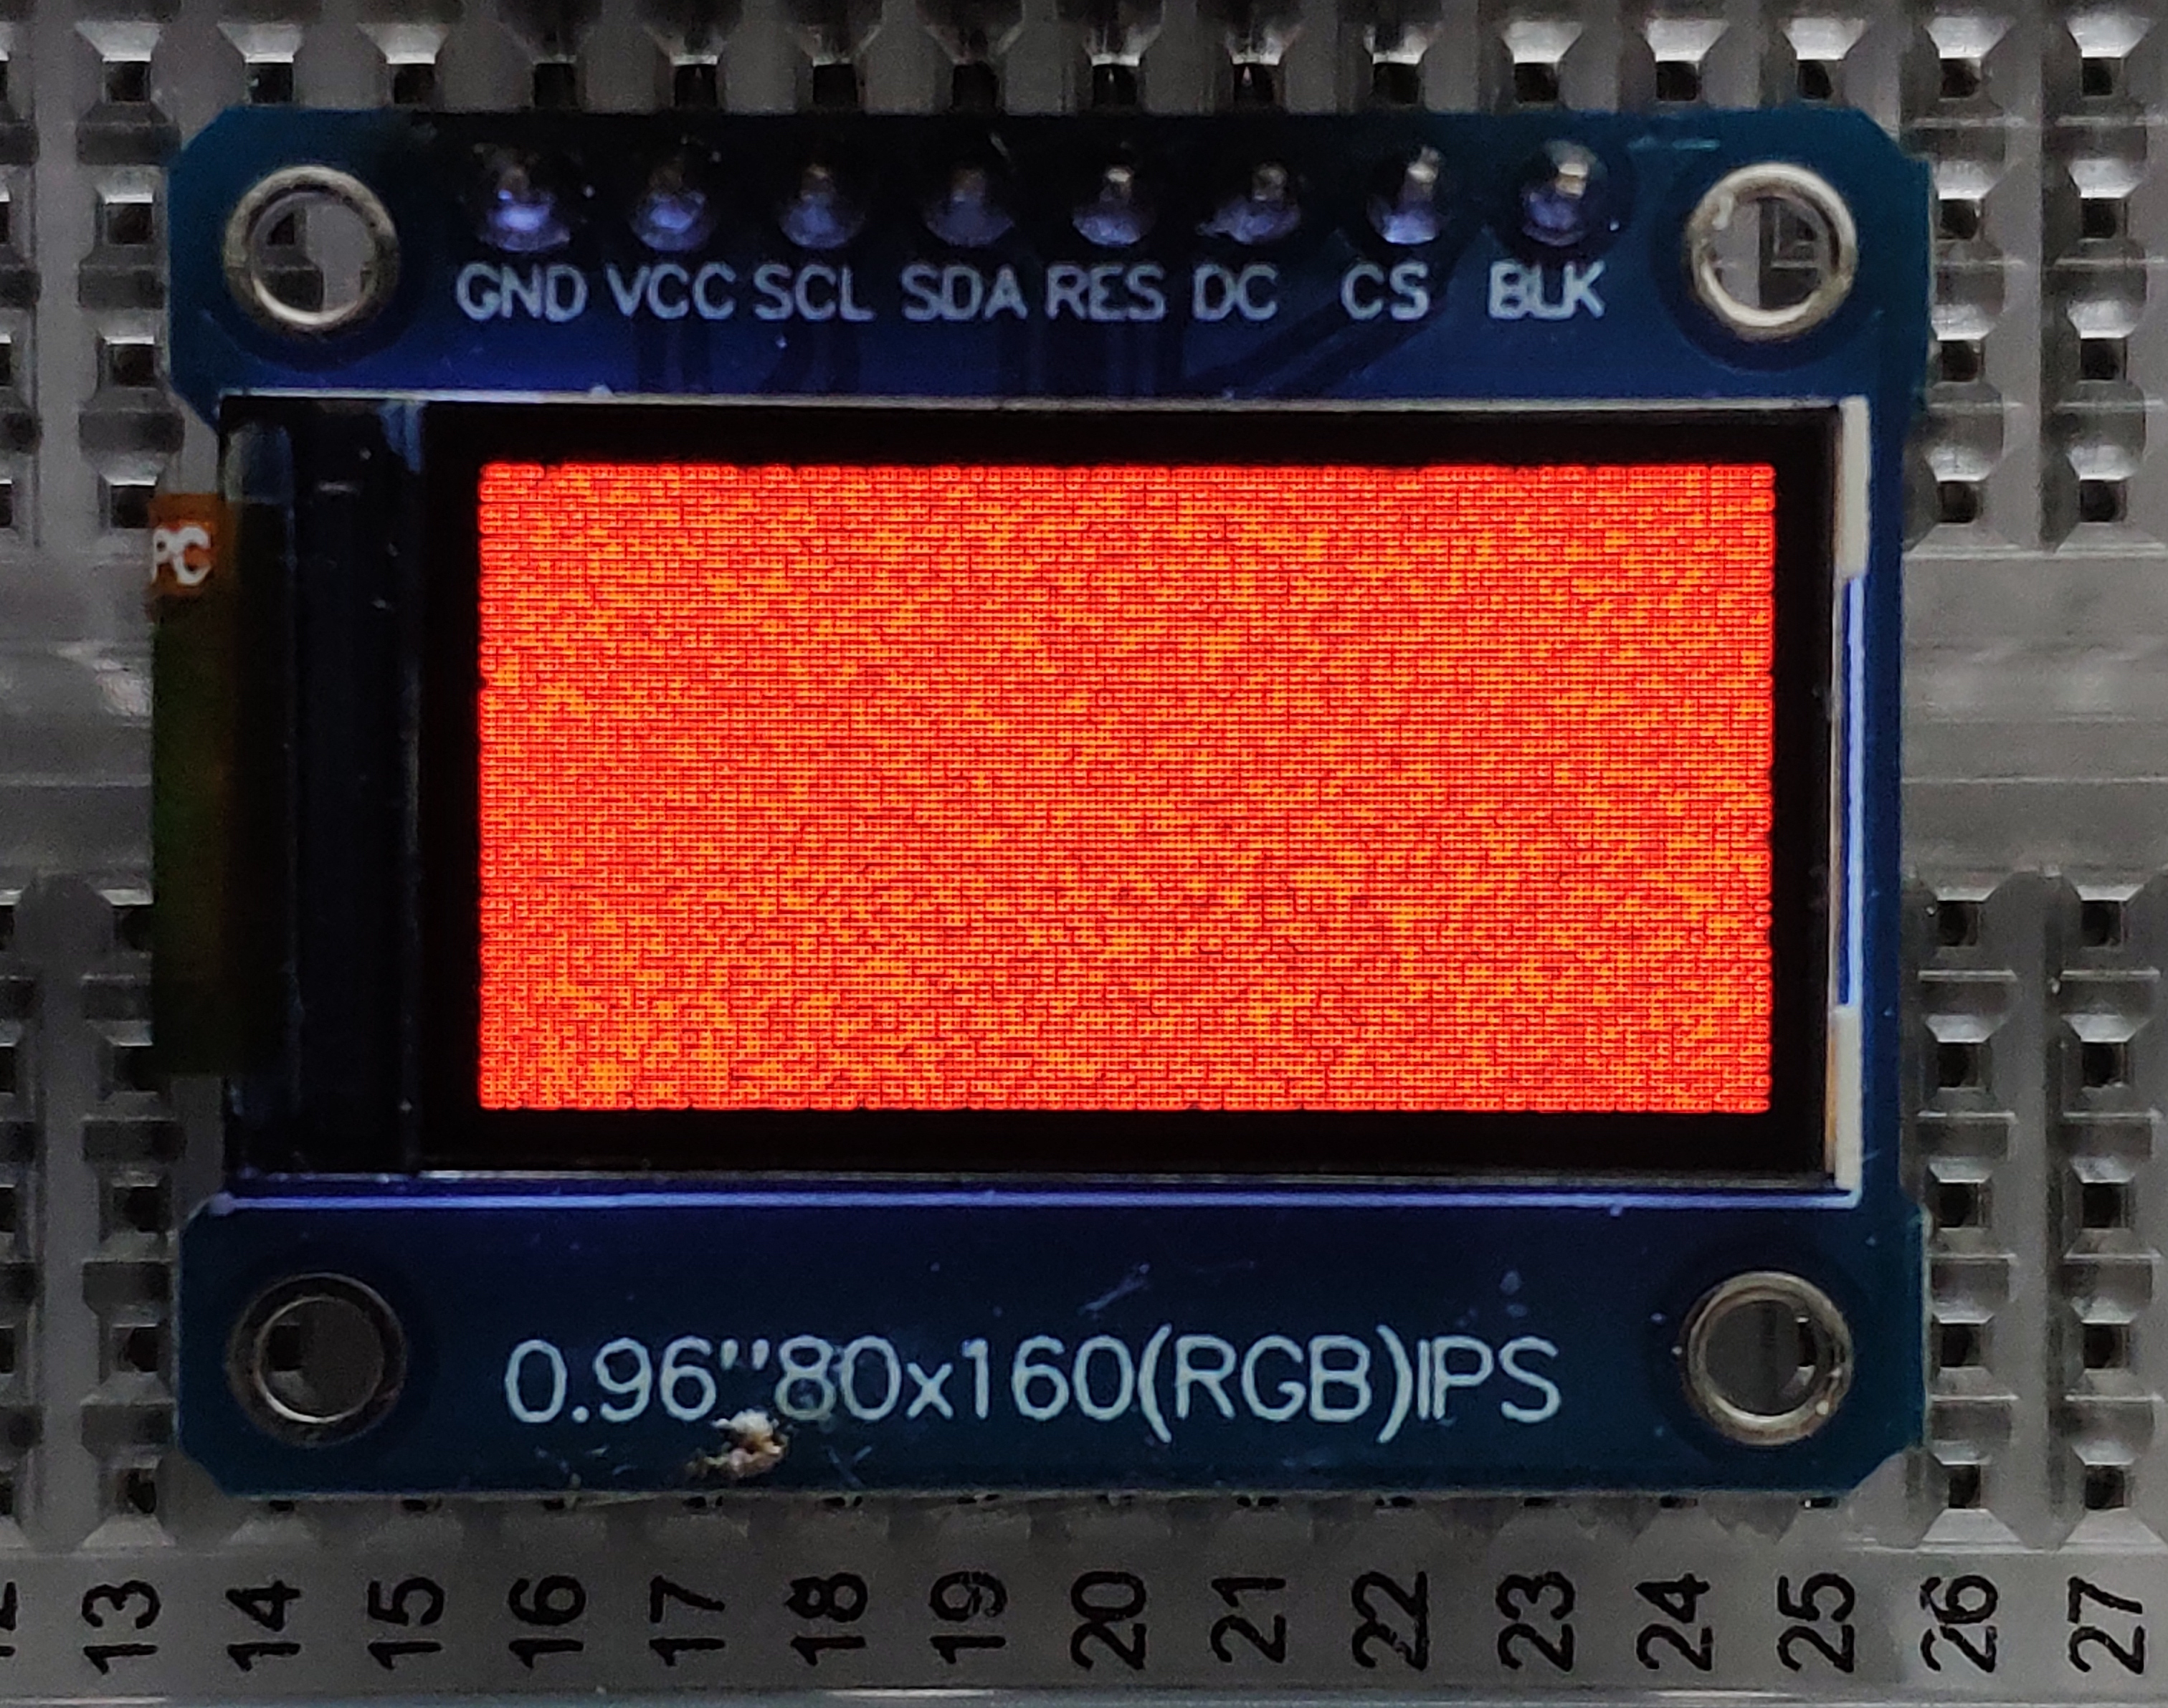
Now, this random is too much random, and does not look natural, there are no patterns etc.
This is where the interesting part happens:
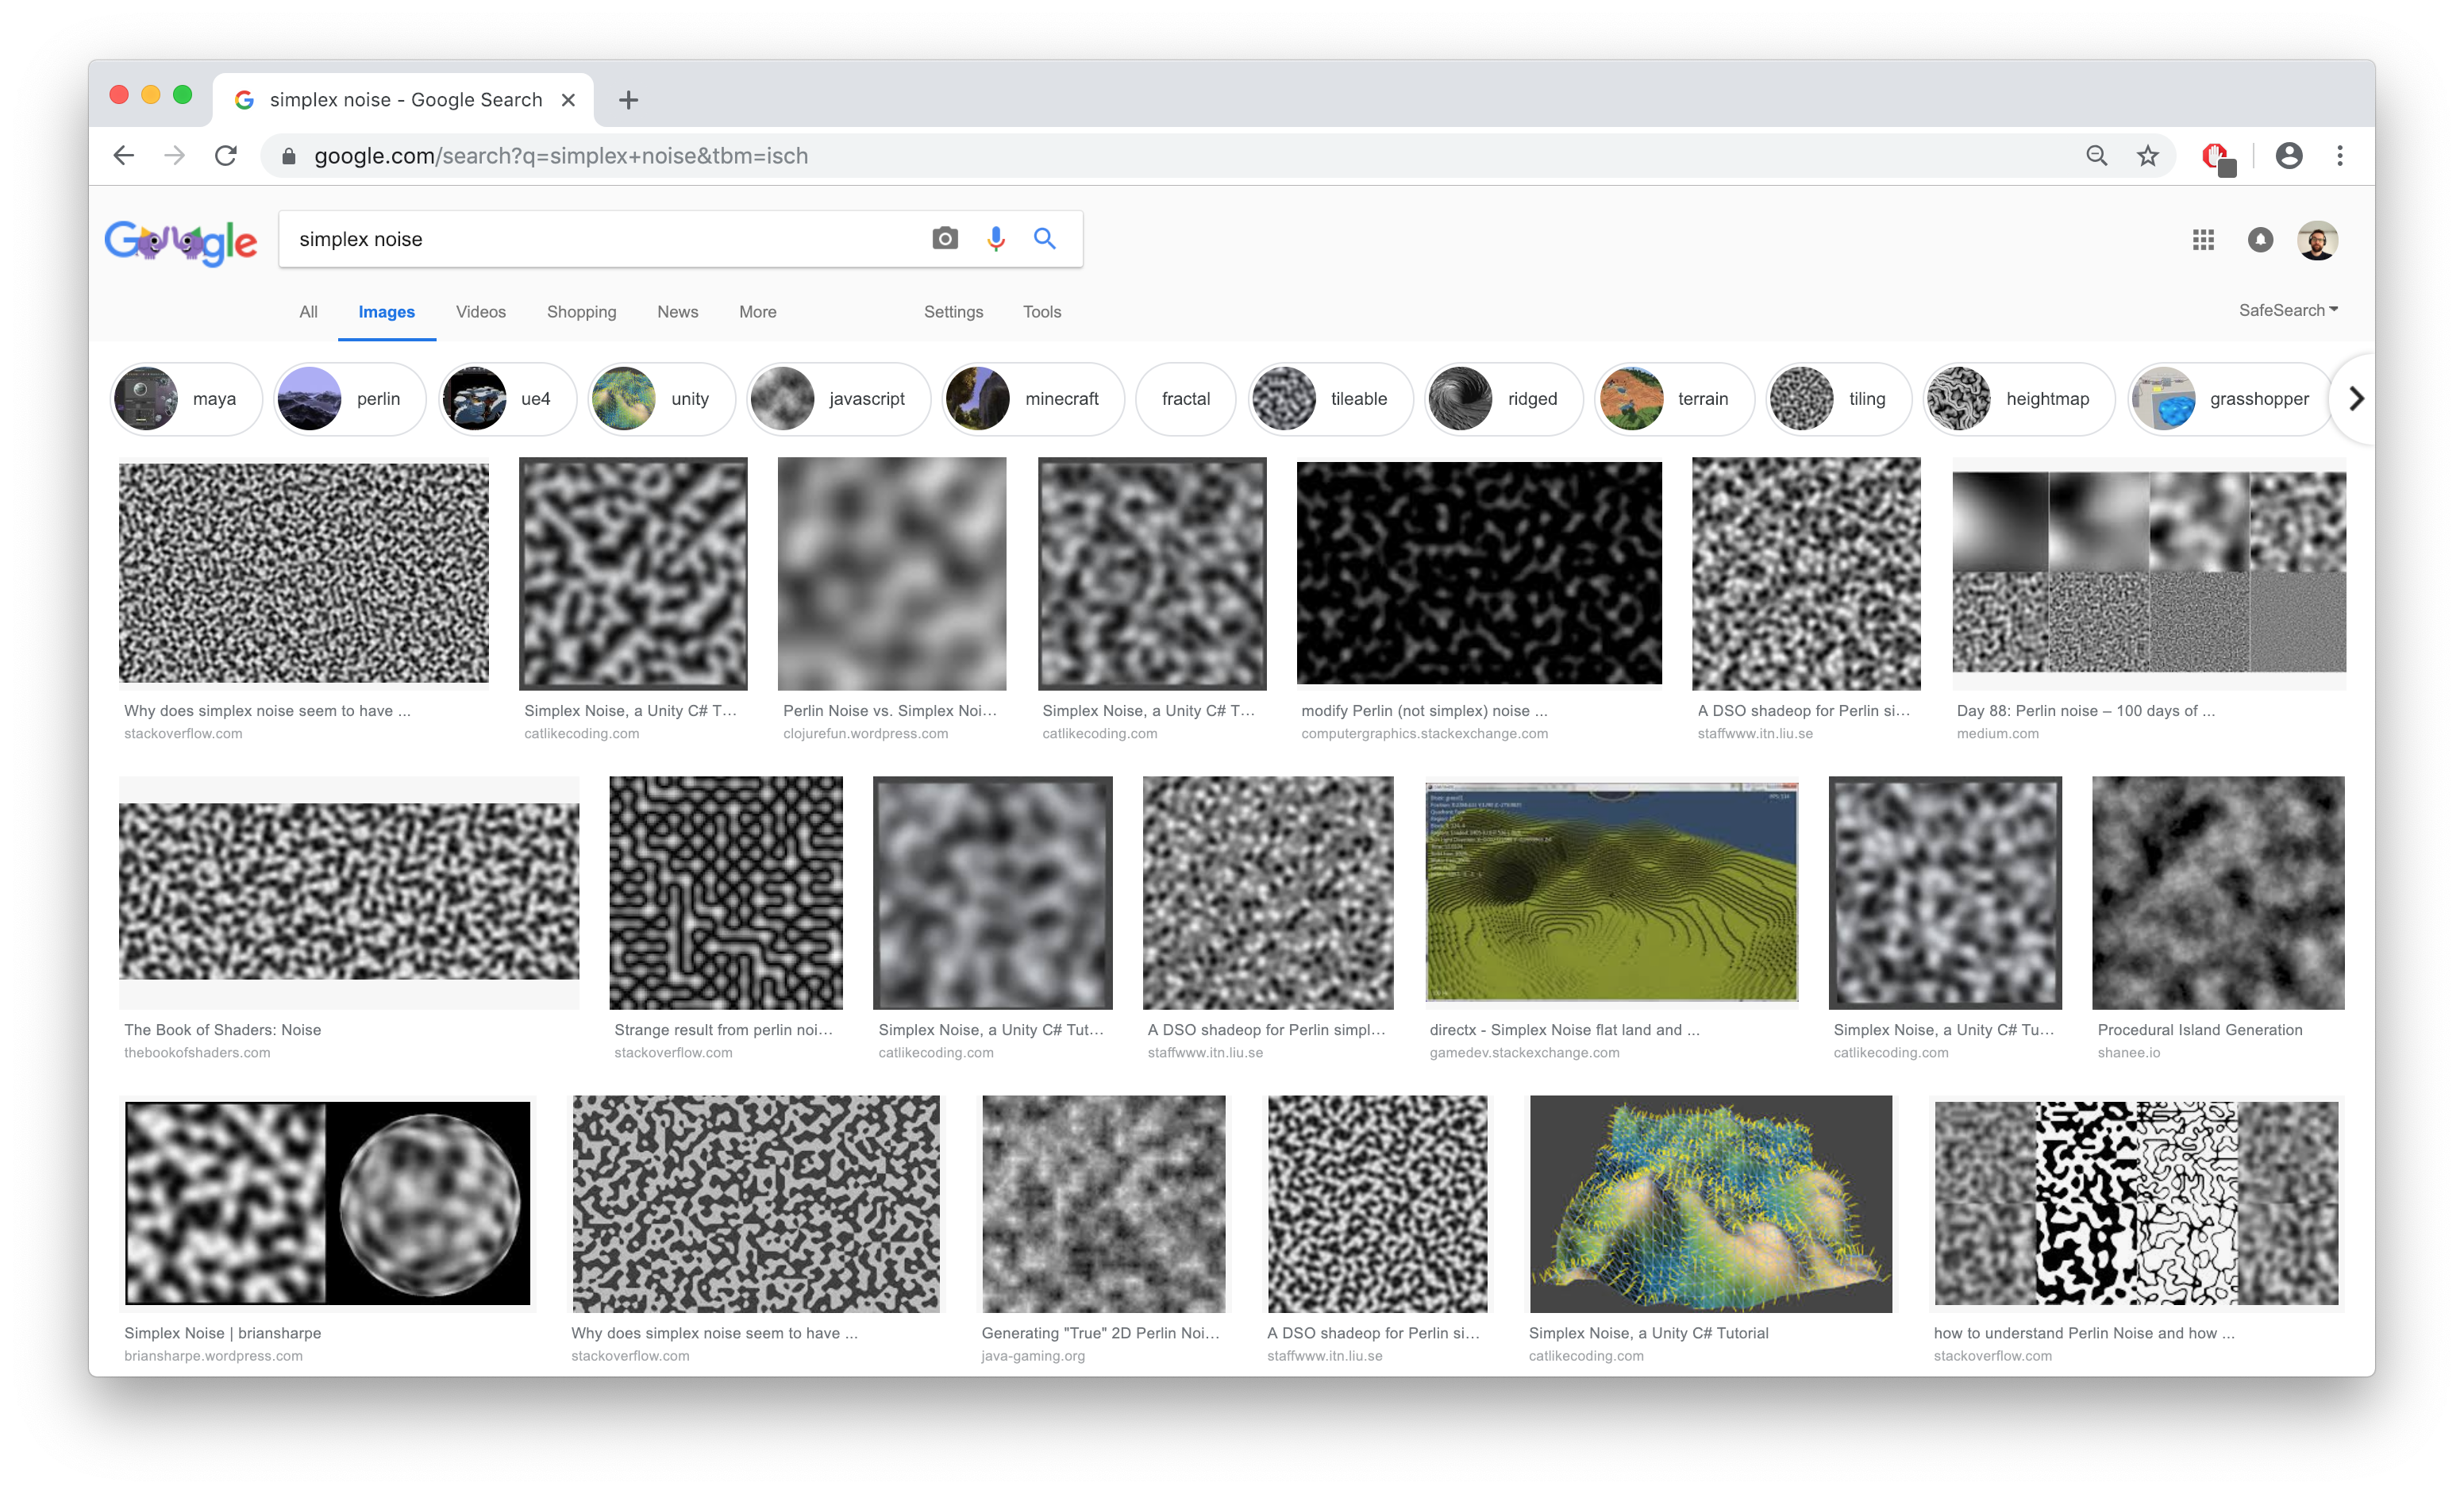
There are already existing random pattern generators, see Wikipedia on Procedural Textures, so we do not need to reinvent the wheel (and imho this is a difficult one):
[…] Initially these functions were based on simple combination of procedural noise functions like Simplex noise or Perlin noise. Currently a vast arsenal of techniques are available, ranging from structured regular texture (like a brick wall), to structured irregular textures (like a stonewall), to purely stochastic textures.
This led me to do an image search on “Simplex Noise”: https://www.google.com/search?q=simplex+noise&tbm=isch
Next, after googling a bit for “Simplex Noise C++”, i found https://github.com/SRombauts/SimplexNoise. You can either clone the repo, or save the SimplexNoise.{h,cpp} next to your project, and add it to your code:
#include <SimplexNoise.h>
SimplexNoise sn;
By calling sn.noise(x, y) we get a noise value in from -1.0 to 1.0. To map this to 0-255 we can add 1.0 to the result and divide it by 2.0. If we multiply this now with 255 we get 0.0-1.0 times 255, whic his 0.0 to 255.0.
Hence, the draw loop boils down to:
void loop(void) {
  tft.startWrite();
  tft.setAddrWindow(0, 0, 160, 80);
  for (uint8_t y = 0; y < 80; y++) {
    for (uint8_t x = 0; x < 160; x++) {
        tft.writePixel(rgb(255 * ((sn.noise(x, y) + 1.0) / 2.0), 0, 0));
    }
  }
  tft.endWrite();
}

Lets zoom in by a factor of x / 8.0, y / 8.0:
void loop(void) {
  tft.startWrite();
  tft.setAddrWindow(0, 0, 160, 80);
  for (uint8_t y = 0; y < 80; y++) {
    for (uint8_t x = 0; x < 160; x++) {
        tft.writePixel(rgb(255 * ((sn.noise(x / 8.0, y / 8.0) + 1.0) / 2.0), 0, 0));
    }
  }
  tft.endWrite();
}
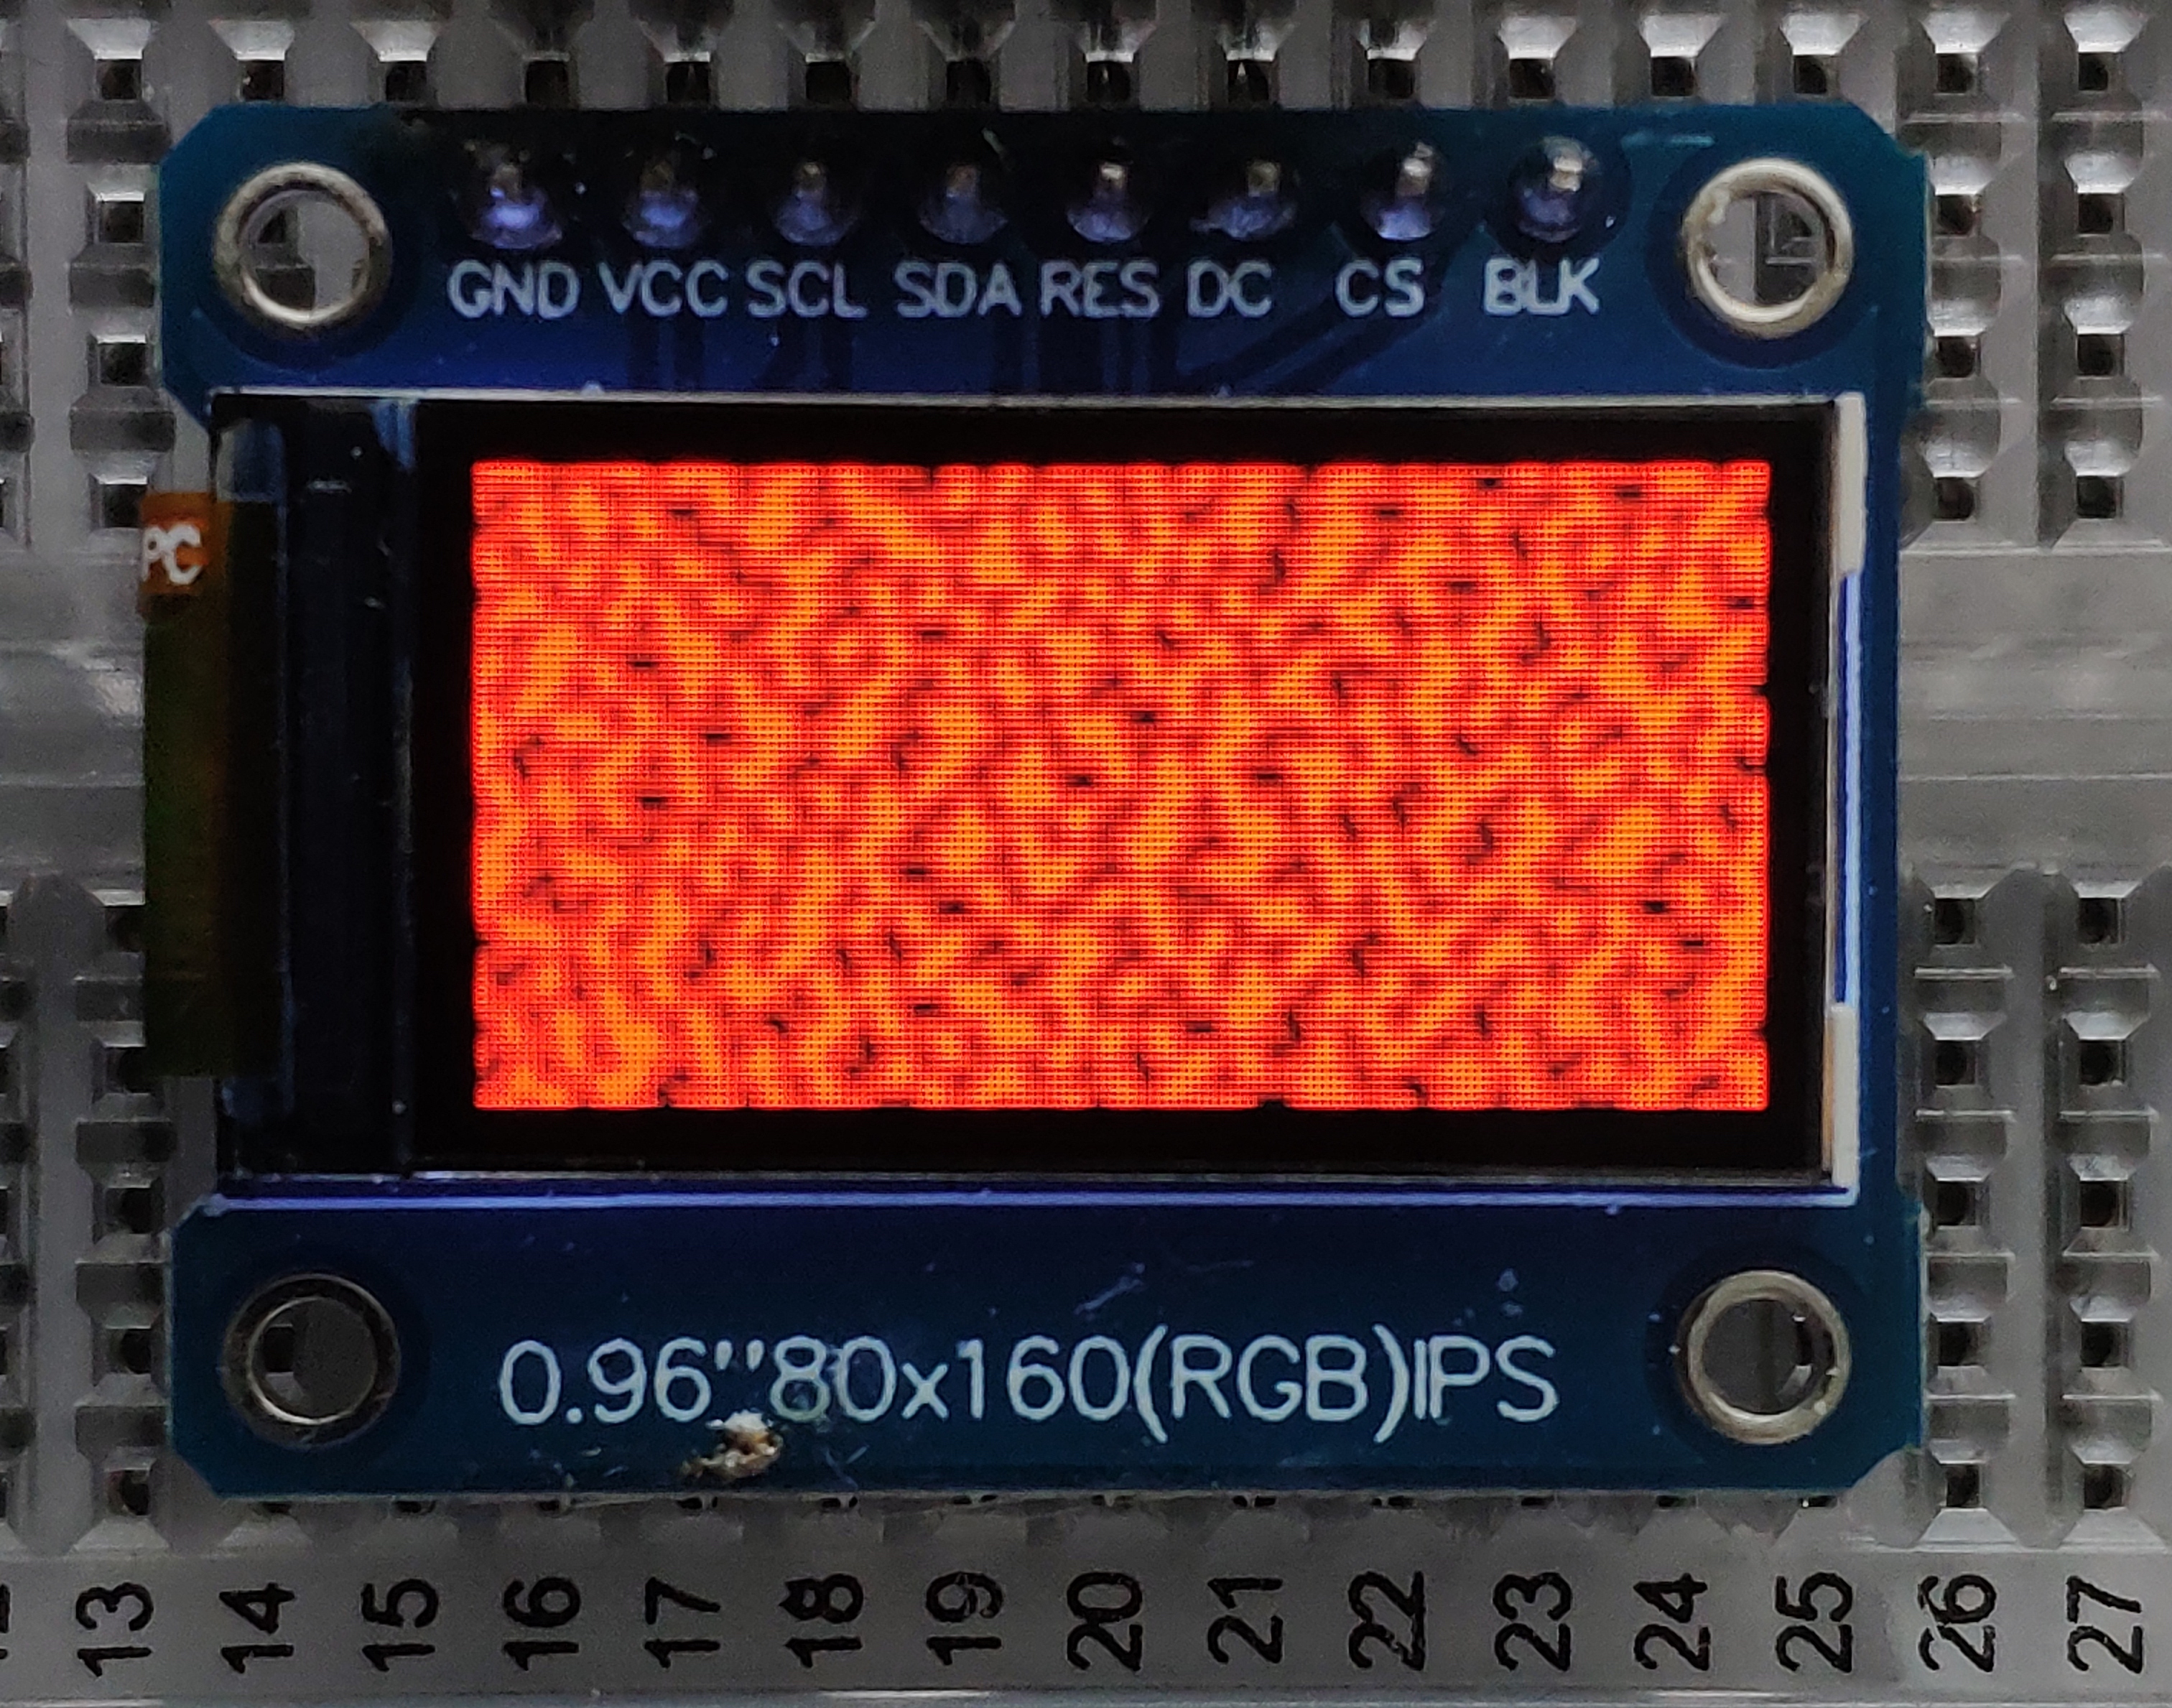
At this point it does not really look like flames yet, maybe it helps when we move it around a bit?
Lets add some motion, by moving the y coordinate by 2.5 units with each frame (m is incremented with each cycle, so we can use y + m in function call):
float m = 0;
void loop(void) {
  m += 2.5;
  tft.startWrite();
  tft.setAddrWindow(0, 0, 160, 80);
  for (uint8_t y = 0; y < 80; y++) {
    for (uint8_t x = 0; x < 160; x++) {
      tft.writePixel(
          rgb(255 * ((sn.noise(x / 8.0, (y + m) / 8.0) + 1.0) / 2.0), 0, 0));
    }
  }
  tft.endWrite();
}
From my experience, flames fade out at the top, somehow.
The idea is to remove intensity of the flame depending on its height. The trivial way would be to multiply the resulting random red value (lets call it r) with y / 80.0. This would give us a linear gradient, which did not convince me.
Playing around with wolframalpha.com, resulted with the following function (y - 40) * (y - 40) / (80.0 * 20.0):

We can see that after 40 steps (going from 80 back to 40, right to left), it reaches zero, which we can use to our advantage.
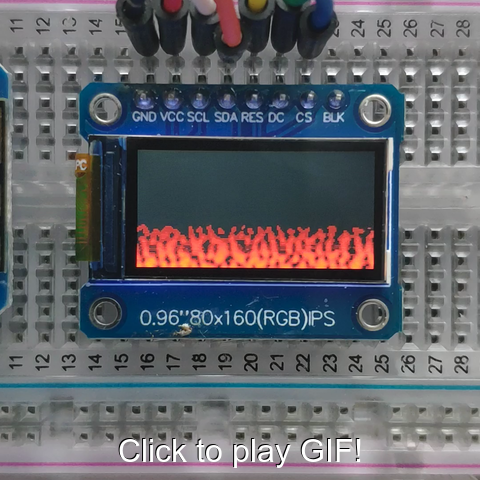
Because we let the flames fade out after half the screen, we only need to render half the screen, which doubles our redraw speed:
float m = 0;
float r = 0;

void loop(void) {
  m += 2.5;
  tft.startWrite();
  tft.setAddrWindow(0, 40, 160, 40);
  for (uint8_t y = 40; y < 80; y++) {
    for (uint8_t x = 0; x < 160; x++) {
      r = (((y - 40) * (y - 40) / (1600.0)) *
           (sn.noise(x / 8.0, (y + m) / 8.0) + 1.0) / 2.0);
      tft.writePixel(rgb(255 * r, 0, 0));
    }
  }
  tft.endWrite();
}
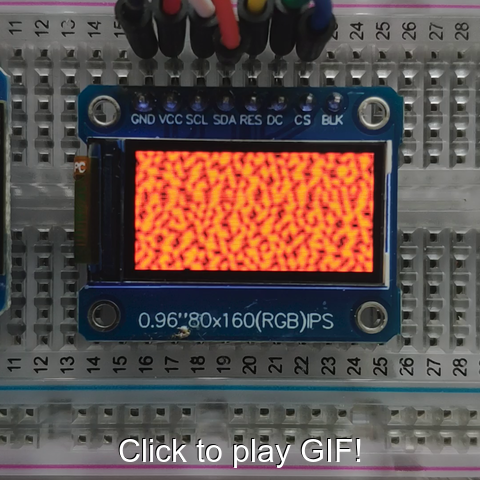
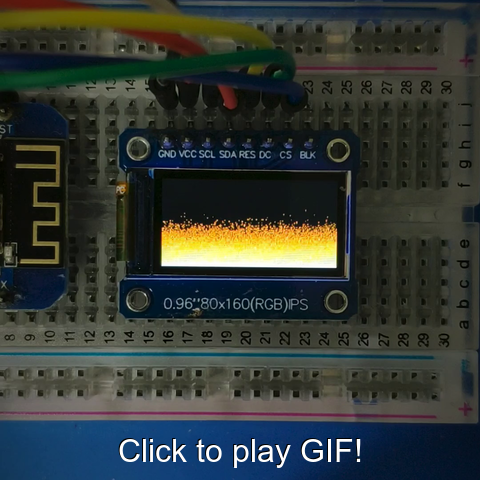
Time to play around, let’s add some yellows, for “realism”:
tft.writePixel(rgb(255 * r, r > .3 ? 64 * r : 0, 0));
The complete Code
The final code then is:
#include <Adafruit_GFX.h>
#include <Adafruit_ST7735.h>
#include <Arduino.h>
#include <SimplexNoise.h>

#define rgb(r, g, b) tft.color565(b, g, r)
Adafruit_ST7735 tft = Adafruit_ST7735(D8, D0, -1);

SimplexNoise sn;

void setup(void) {
  tft.initR(INITR_MINI160x80);
  tft.setRotation(3);
  tft.fillScreen(ST77XX_BLACK);
}

float m = 0; // movement
float r = 0; // red/random value

void loop(void) {
  m += 2.5;
  tft.startWrite();
  tft.setAddrWindow(0, 40, 160, 40);
  for (uint8_t y = 40; y < 80; y++) {
    for (uint8_t x = 0; x < 160; x++) {
      r = (((y - 40) * (y - 40) / (1200.0)) *
           (sn.noise(x / 8.0, (y + m) / 8.0) + 1.0) / 2.0);
      tft.writePixel(rgb(255 * r, r > .2 ? 16 * r : 0, 0));
    }
  }
  tft.endWrite();
}
Next Steps
Of course you could now cache the calculated random values and use a ring structure to only need to calculate a new row of pixels with each frame, making it a lot faster.
Or use a different value/location for the random yellow flames, to make it look better.
Or skew the x coordinates to make the flames narrower, maybe even more flamey.
I will leave this to you ;).
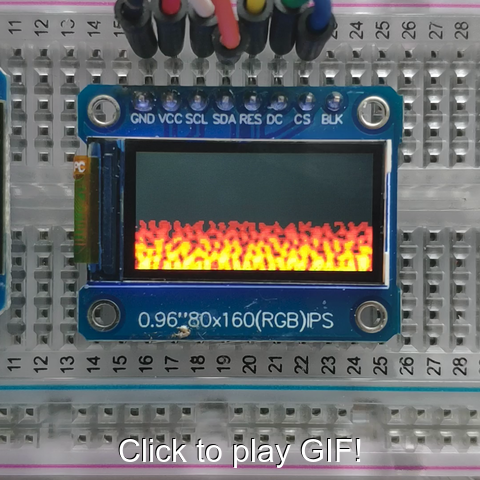
The DOOM Version
Fabien Sanglard wrote a nice article about the DOOM fire animation.
Ofcourse, I had to try that approach, too :):
This is the resulting code:
#include <Adafruit_GFX.h>
#include <Adafruit_ST7735.h>
#include <Arduino.h>

#define rgb(r, g, b) tft.color565(b, g, r)

const uint16_t doomColorMap[36] = {
    rgb(0x00, 0x00, 0x00), // #000000
    rgb(0x1f, 0x07, 0x07), // #1f0707
    rgb(0x2f, 0x0f, 0x07), // #2f0f07
    rgb(0x47, 0x0f, 0x07), // #470f07
    rgb(0x57, 0x17, 0x07), // #571707
    rgb(0x67, 0x1f, 0x07), // #671f07
    rgb(0x77, 0x1f, 0x07), // #771f07
    rgb(0x8f, 0x27, 0x07), // #8f2707
    rgb(0x9f, 0x2f, 0x07), // #9f2f07
    rgb(0xaf, 0x3f, 0x07), // #af3f07
    rgb(0xbf, 0x47, 0x07), // #bf4707
    rgb(0xc7, 0x47, 0x07), // #c74707
    rgb(0xDF, 0x4F, 0x07), // #DF4F07
    rgb(0xDF, 0x57, 0x07), // #DF5707
    rgb(0xDF, 0x57, 0x07), // #DF5707
    rgb(0xD7, 0x5F, 0x07), // #D75F07
    rgb(0xD7, 0x67, 0x0F), // #D7670F
    rgb(0xcf, 0x6f, 0x0f), // #cf6f0f
    rgb(0xcf, 0x77, 0x0f), // #cf770f
    rgb(0xcf, 0x7f, 0x0f), // #cf7f0f
    rgb(0xCF, 0x87, 0x17), // #CF8717
    rgb(0xC7, 0x87, 0x17), // #C78717
    rgb(0xC7, 0x8F, 0x17), // #C78F17
    rgb(0xC7, 0x97, 0x1F), // #C7971F
    rgb(0xBF, 0x9F, 0x1F), // #BF9F1F
    rgb(0xBF, 0x9F, 0x1F), // #BF9F1F
    rgb(0xBF, 0xA7, 0x27), // #BFA727
    rgb(0xBF, 0xA7, 0x27), // #BFA727
    rgb(0xBF, 0xAF, 0x2F), // #BFAF2F
    rgb(0xB7, 0xAF, 0x2F), // #B7AF2F
    rgb(0xB7, 0xB7, 0x2F), // #B7B72F
    rgb(0xB7, 0xB7, 0x37), // #B7B737
    rgb(0xCF, 0xCF, 0x6F), // #CFCF6F
    rgb(0xDF, 0xDF, 0x9F), // #DFDF9F
    rgb(0xEF, 0xEF, 0xC7), // #EFEFC7
    rgb(0xFF, 0xFF, 0xFF)  // #FFFFFF
};

uint8_t firePixels[80][160]; // only stores the pixel "temperature"
void setupFirepixels(void) {
  for (uint8_t y = 0; y < 80; y++) {
    for (uint8_t x = 0; x < 160; x++) {
      // last row is hot
      firePixels[y][x] = y == 79 ? 35 : 0;
    }
  }
}

void setup(void) {
  setupFirepixels();
  tft.initR(INITR_MINI160x80);
  tft.setRotation(3);
  tft.fillScreen(ST77XX_BLACK);
}

void loop(void) {
  // recalculate fire
  for (uint8_t y = 0; y < 79; y++) {
    for (uint8_t x = 0; x < 160; x++) {
      uint8_t wind = x + random(2);
      wind = wind >= 160 ? wind - 160 : wind;
      uint8_t speed = y + random(2);
      speed = speed >= 80 ? 79 : speed;
      firePixels[y][x] = firePixels[speed][wind] - random(2);
      firePixels[y][x] =
          firePixels[y][x] > 35 ? 0 : firePixels[y][x]; // fix overflow
    }
    delay(0);
  }

  // draw fire
  tft.startWrite();
  tft.setAddrWindow(0, 0, 160, 80);
  for (uint8_t y = 0; y < 80; y++) {
    for (uint8_t x = 0; x < 160; x++) {
      tft.writePixel(doomColorMap[firePixels[y][x]]);
    }
  }
  tft.endWrite();
}